Building the "Order Management" Training App : Creating links
What is a Link?
A Link in Simplicité represents a relationship between Business objects. It is defined physically by a foreign key in the database and configured using an Object field...
Creating a Link between Supplier and Product
To create a link between the Supplier Business object and the Product Business object, follow the steps below:
- In the Business objects > Business objects menu
- Open TrnProduct
- Click Edit form on the Business object's form (this will open the template editor)

- Hover over the Field Area and click on the
+
For more information about Field Areas, see Field Area
- Click Business Object
- In the search box, enter TrnSupplier

- Check Functional key ? and Required ?
For more information about Functional keys, see Functional key
- Click Save
The Supplier Code Joined field is added to the template.
For more information about Joined field, see Joined field
Creating a Link between Product and Order
To create a link between the Product Business object and the Order Business object, follow the steps below:
- In the Business objects > Business objects menu
- Open TrnOrder
- Click Edit form on the Business object's form (this will open the template editor)
- Hover over the Field Area and click on the
+ - Click Business Object
- In the search box, enter TrnProduct
- Check Functional key ? and Required ?
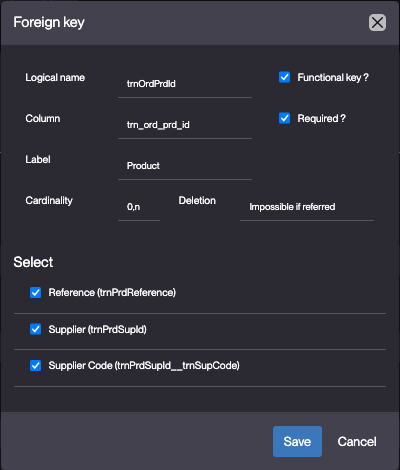
- Click Save
This will add the TrnProduct joined fields to the template, allowing the Order object to reference a product.
Creating a link between Client and Order
To create a link between the Client and Order business objects, follow the same steps as for linking Product to Order, with one key difference:
At step 6, in the search box, enter TrnClient instead of TrnProduct.
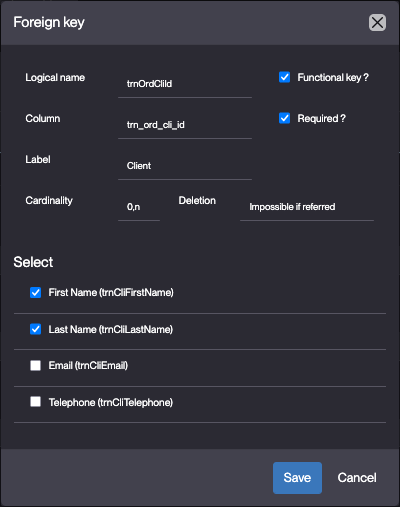
This will add the TrnClient joined fields to the template, allowing the Order object to reference client information.
Adding data to the Application
Log in using usertest
Clear the platform's cache and log in using usertest
For a detailed step-by-step see : Testing the User
Expected result:
- The Suppliers, Clients, Products, Orders are visible
- For each object, the Create button is displayed
Create a Supplier
- Click the Suppliers menu
- Click Create
- Fill in the Supplier information like so :
- Code : BIM
- Name : Bim Computers Ltd.
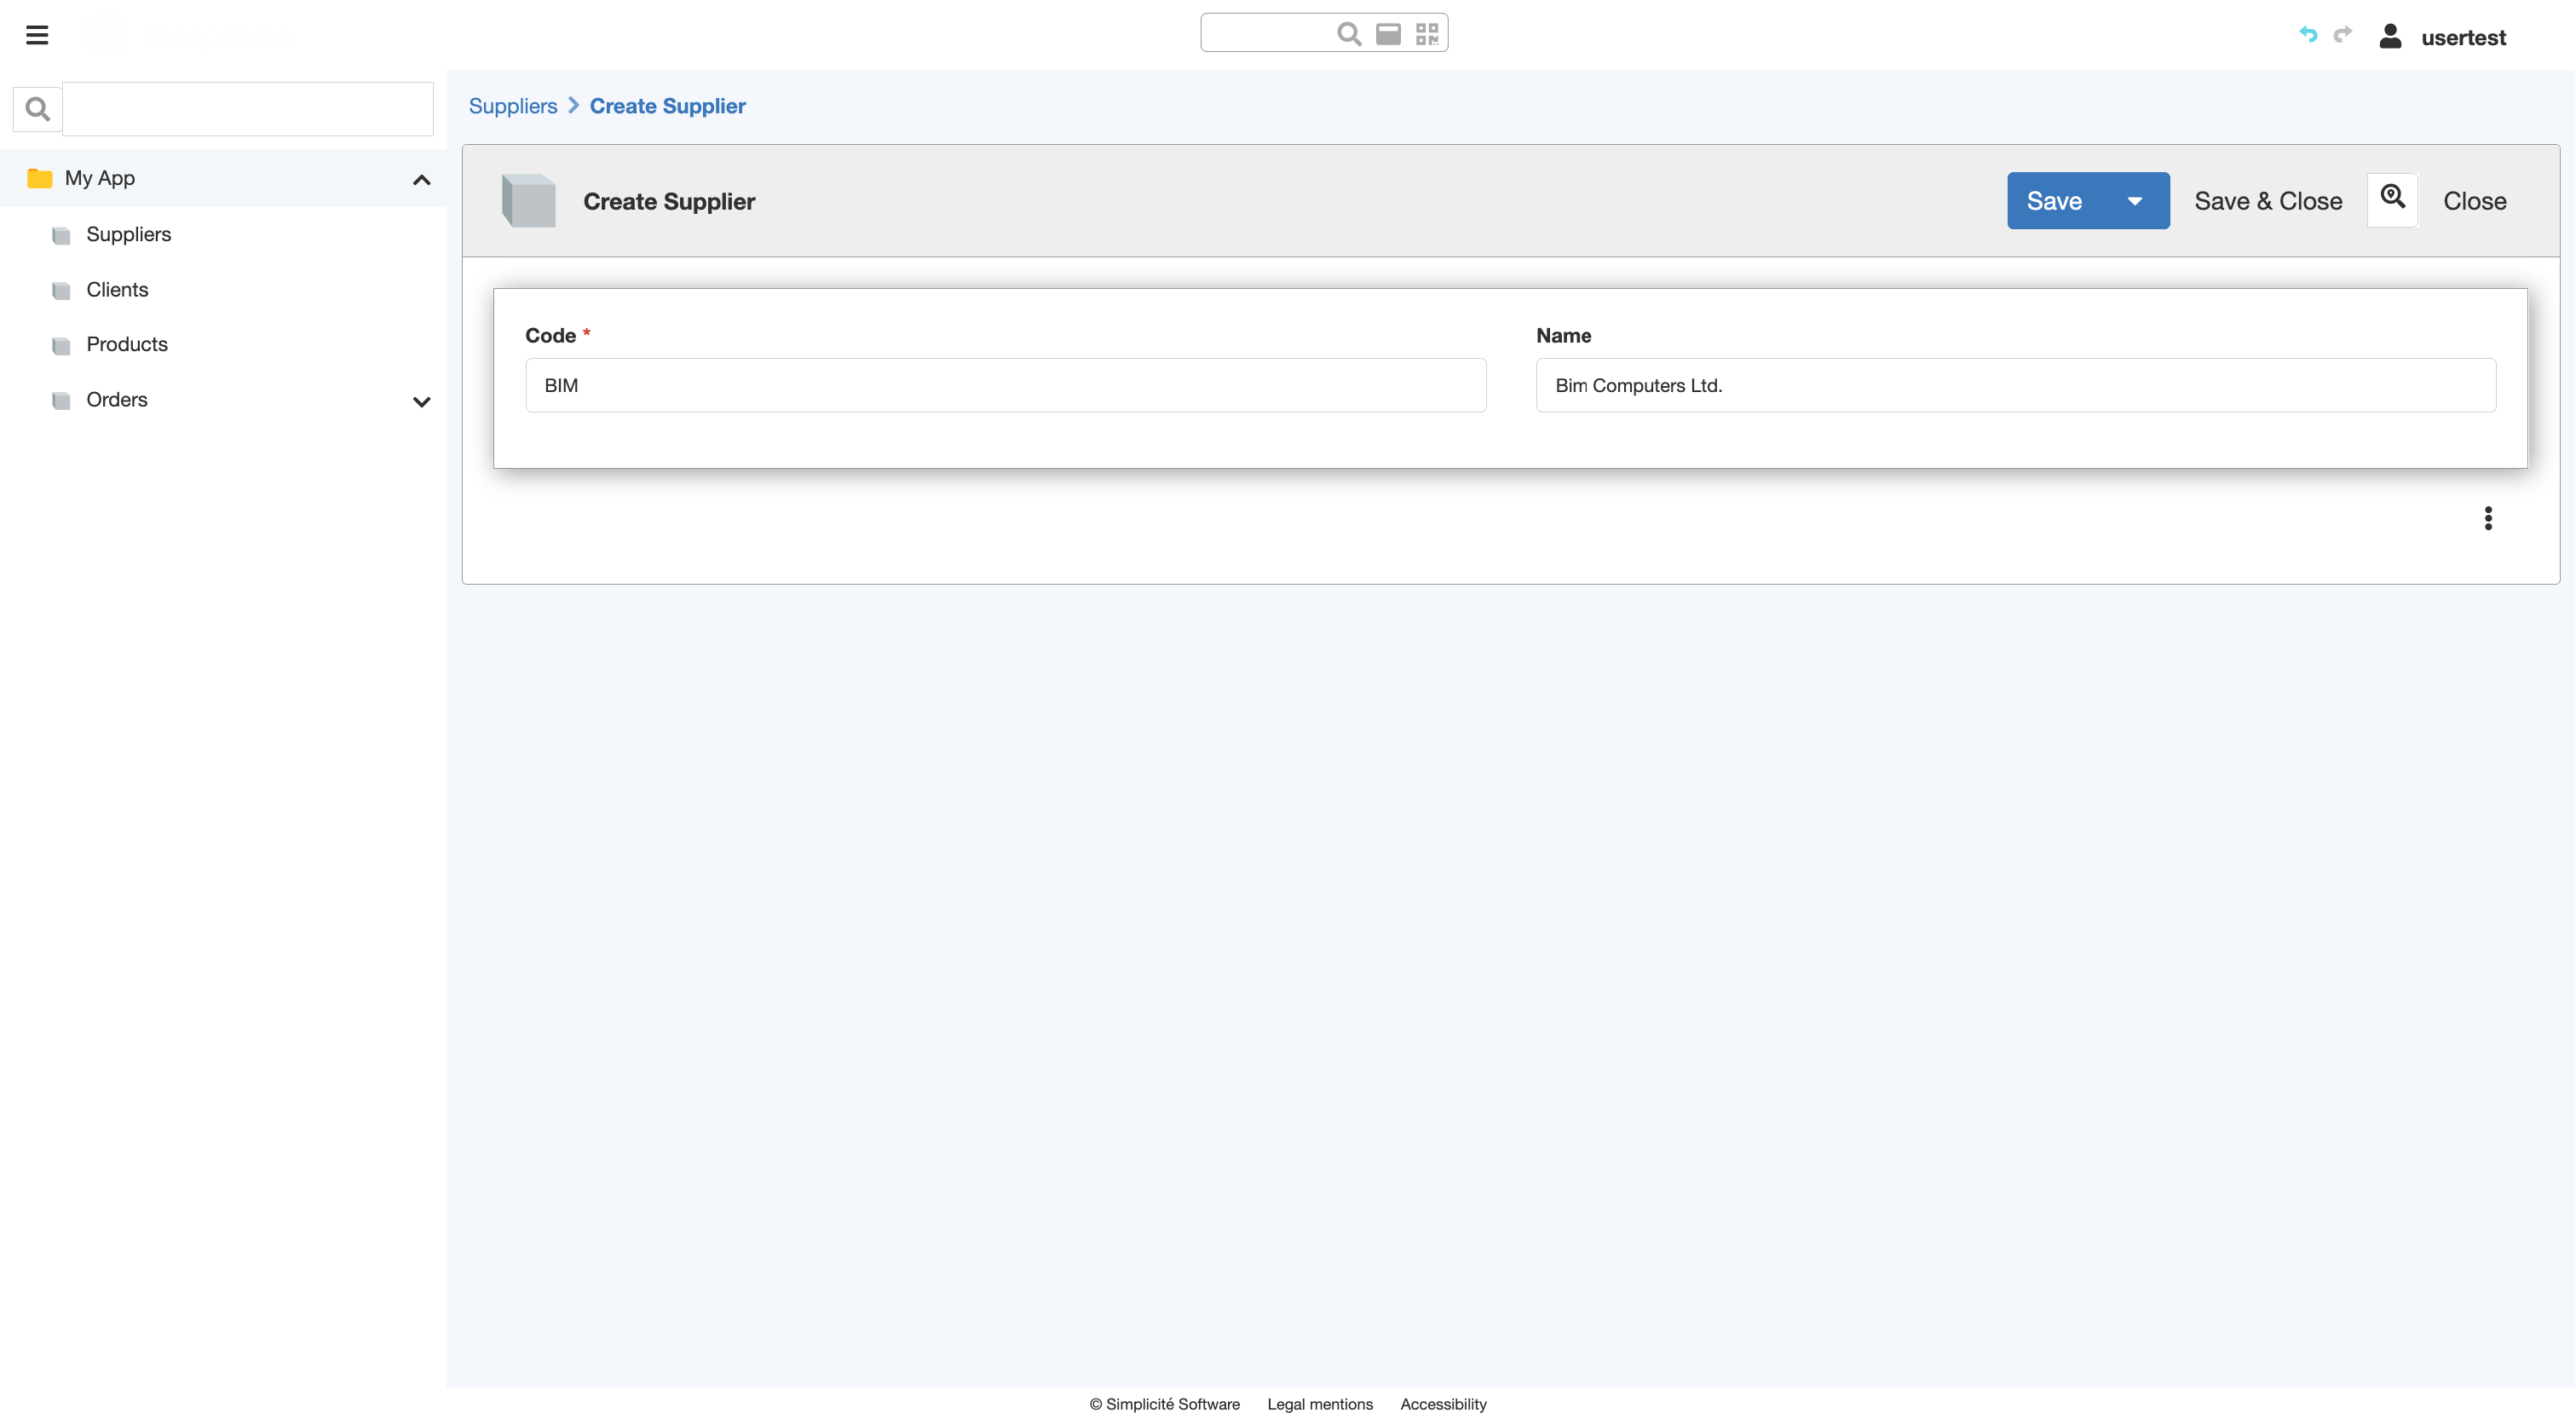
- Click Save
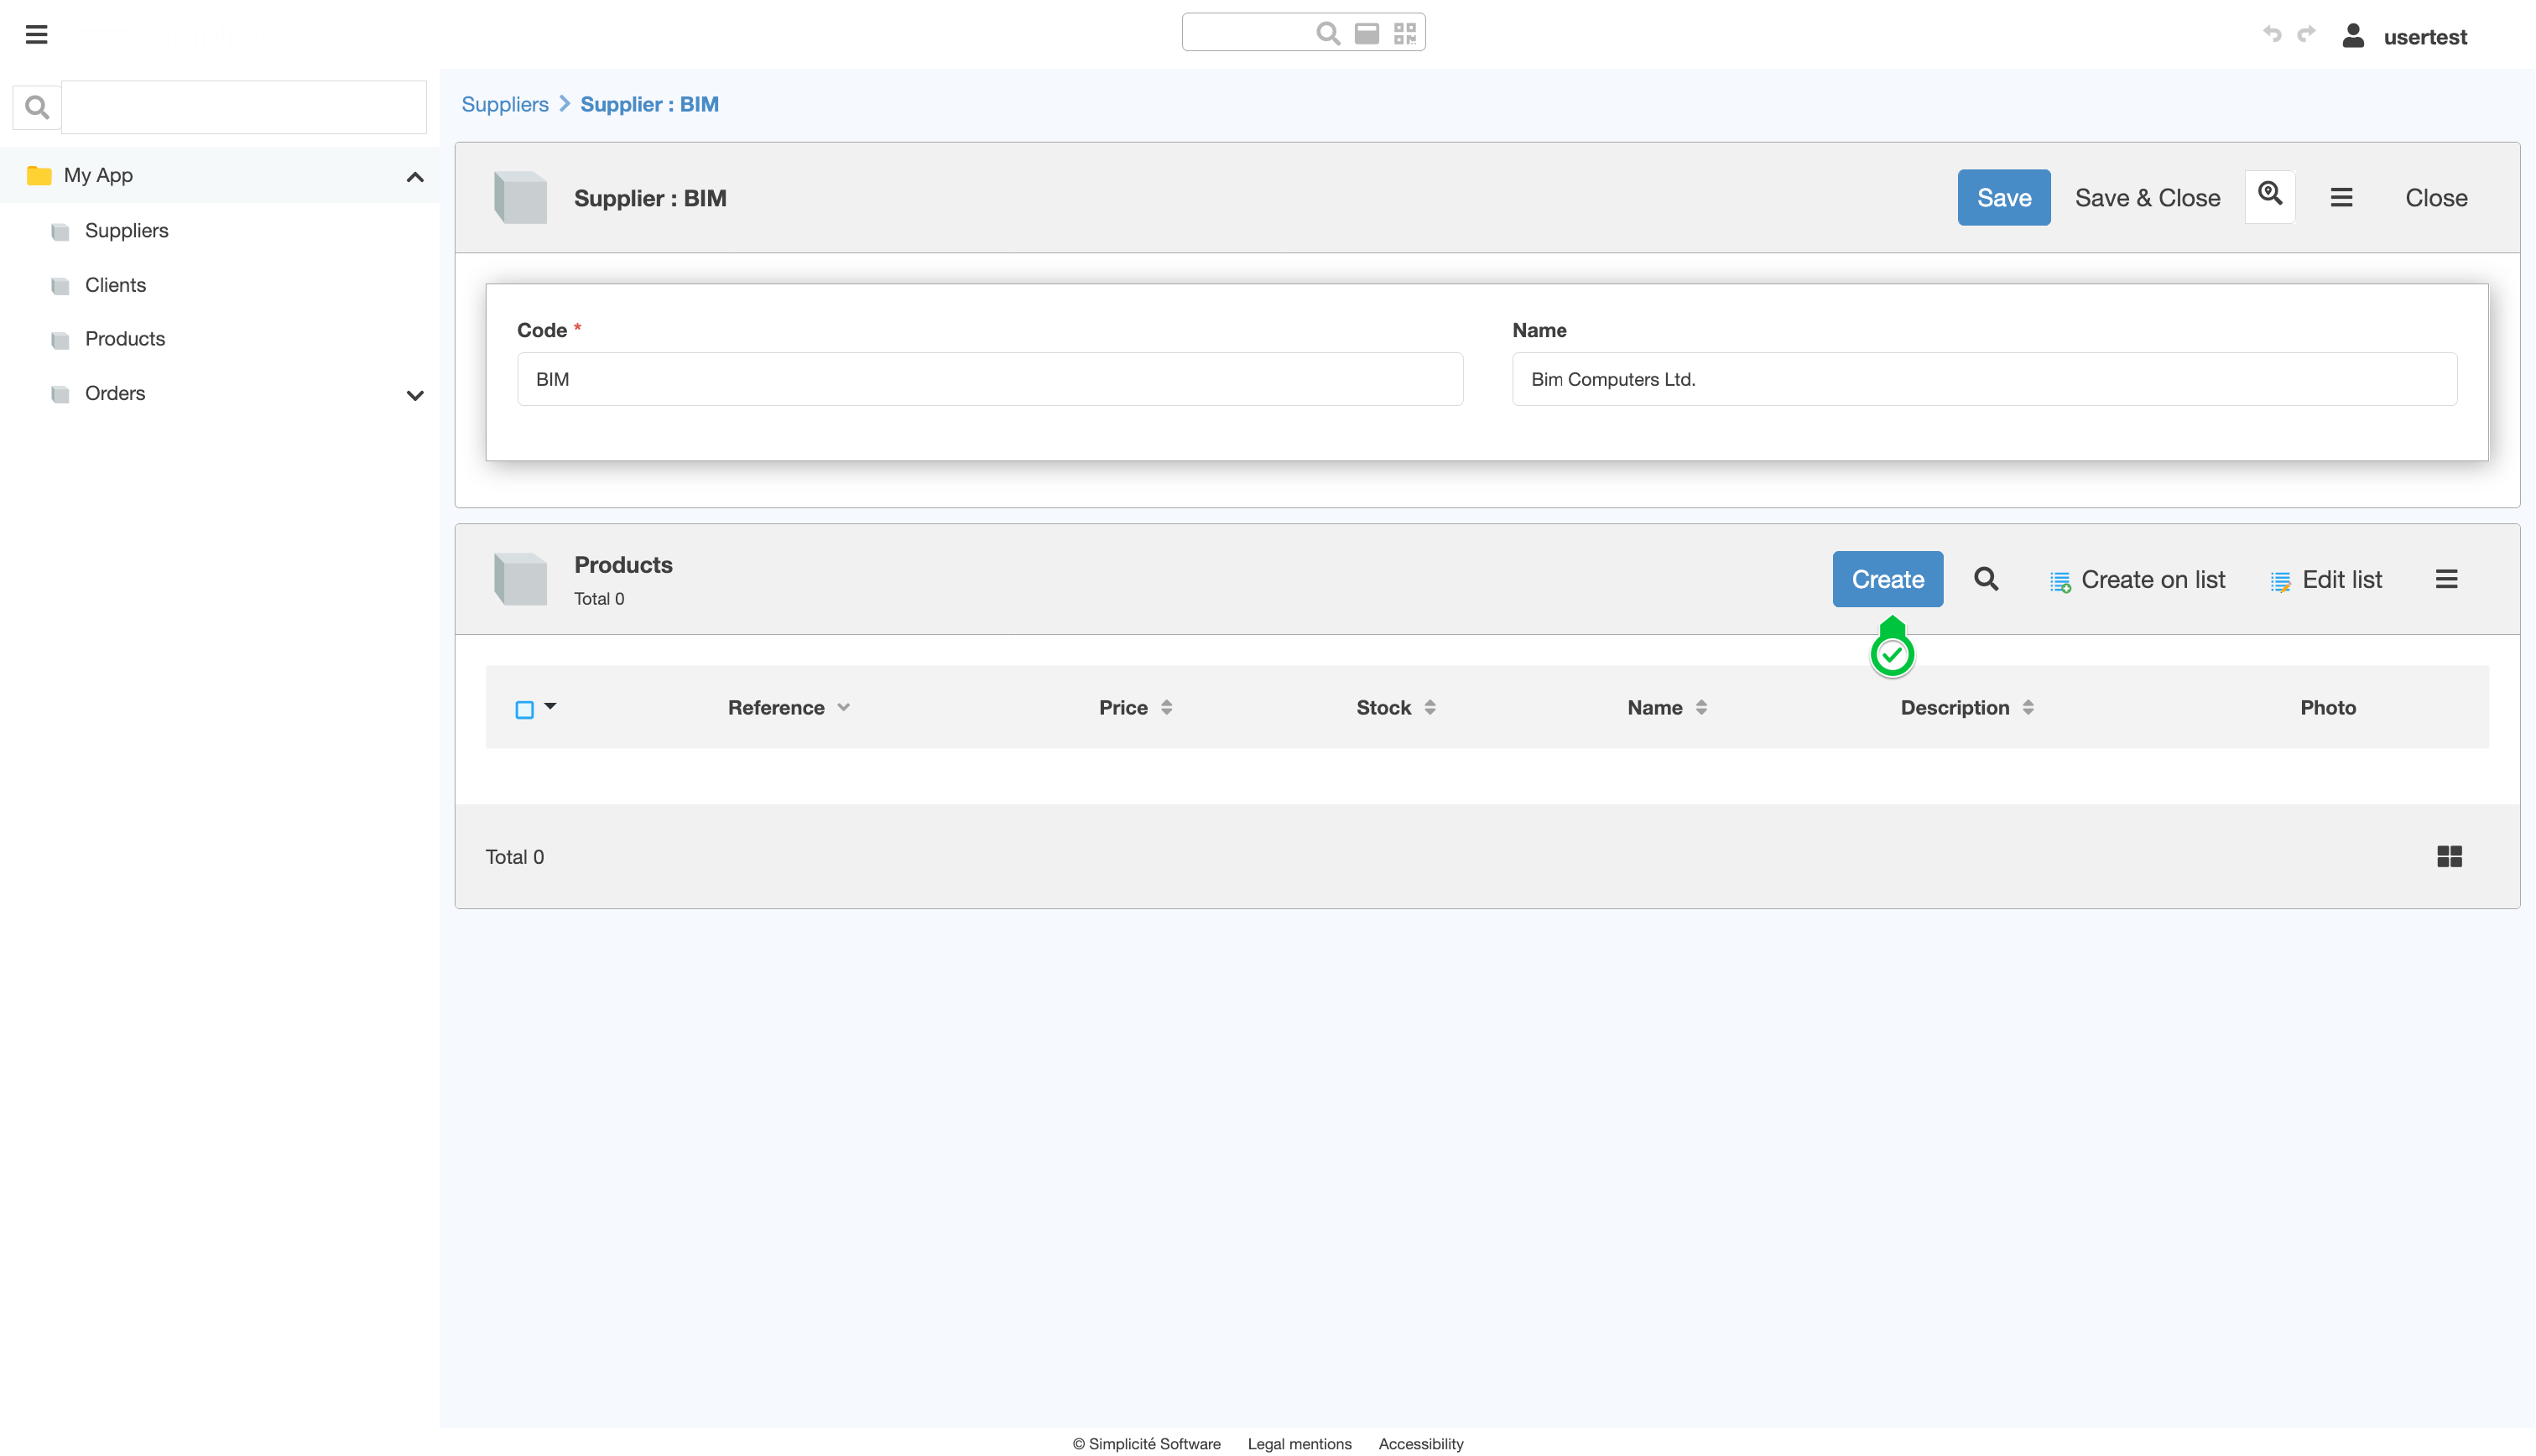
Create a Product
- On the BIM Supplier's form, click Create on the linked Products list
- Fill in the Product information like so :
- Reference : REF001
- Price : 100
- Stock : 100
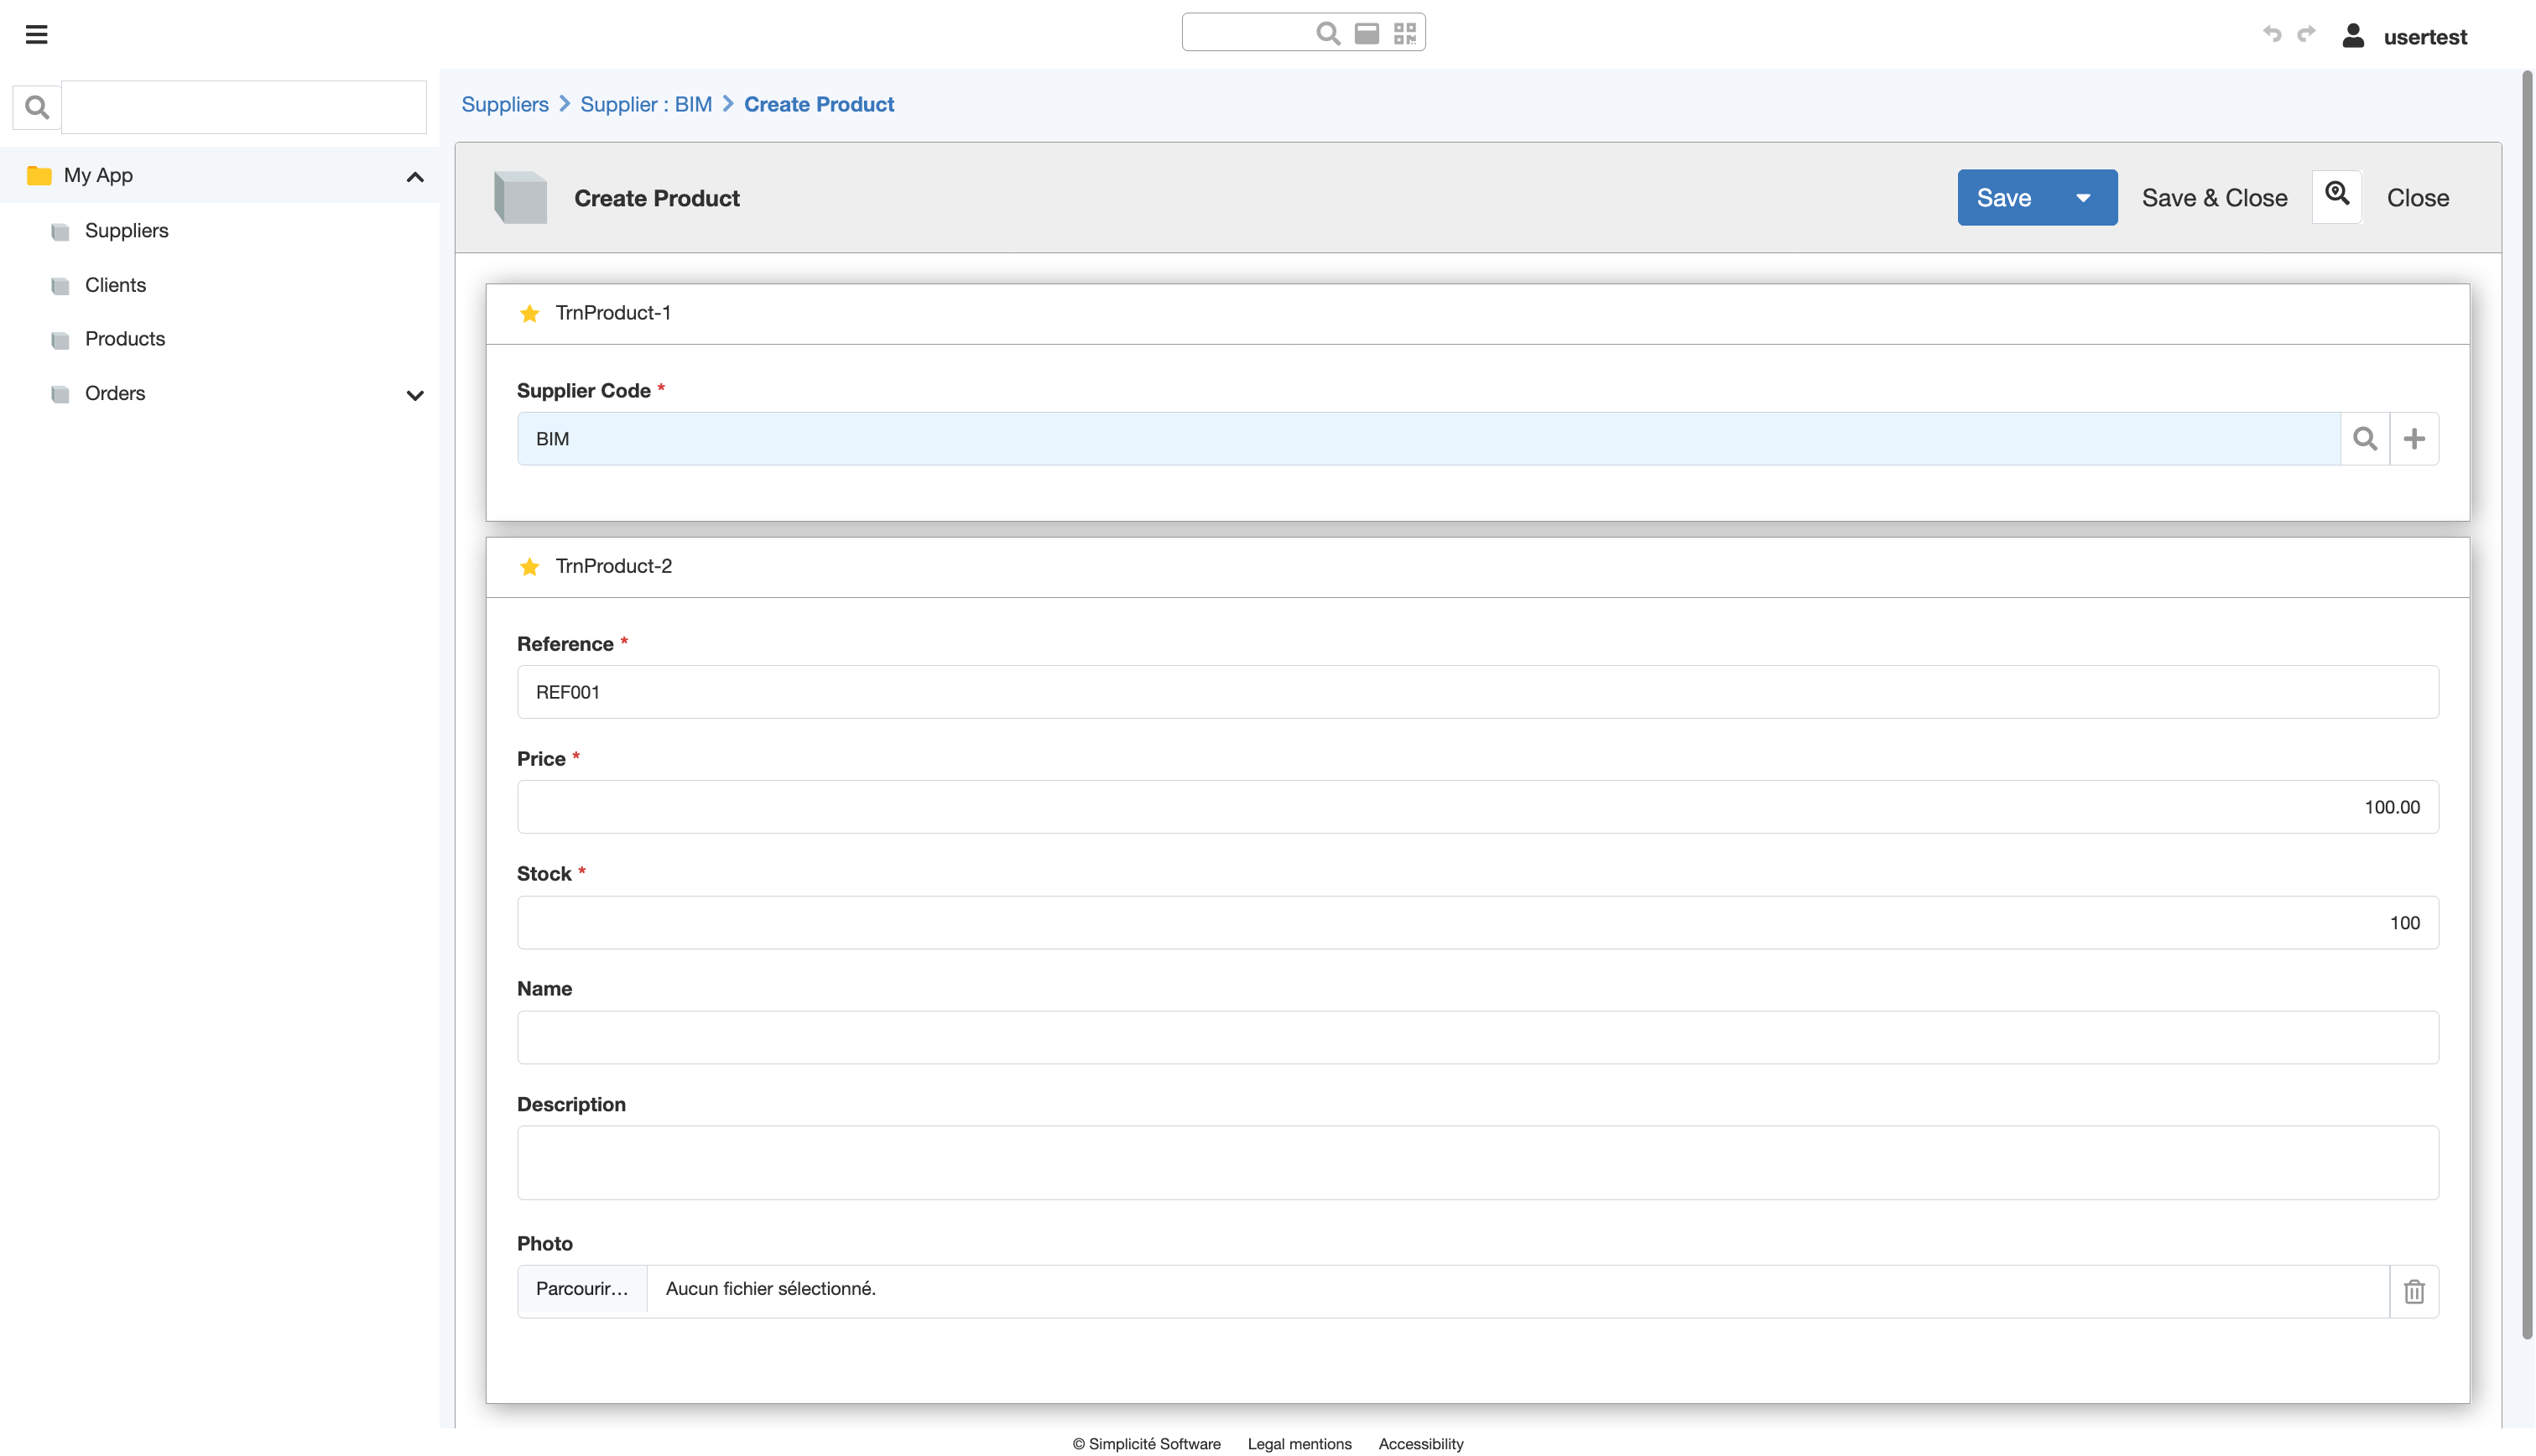
- Click Save
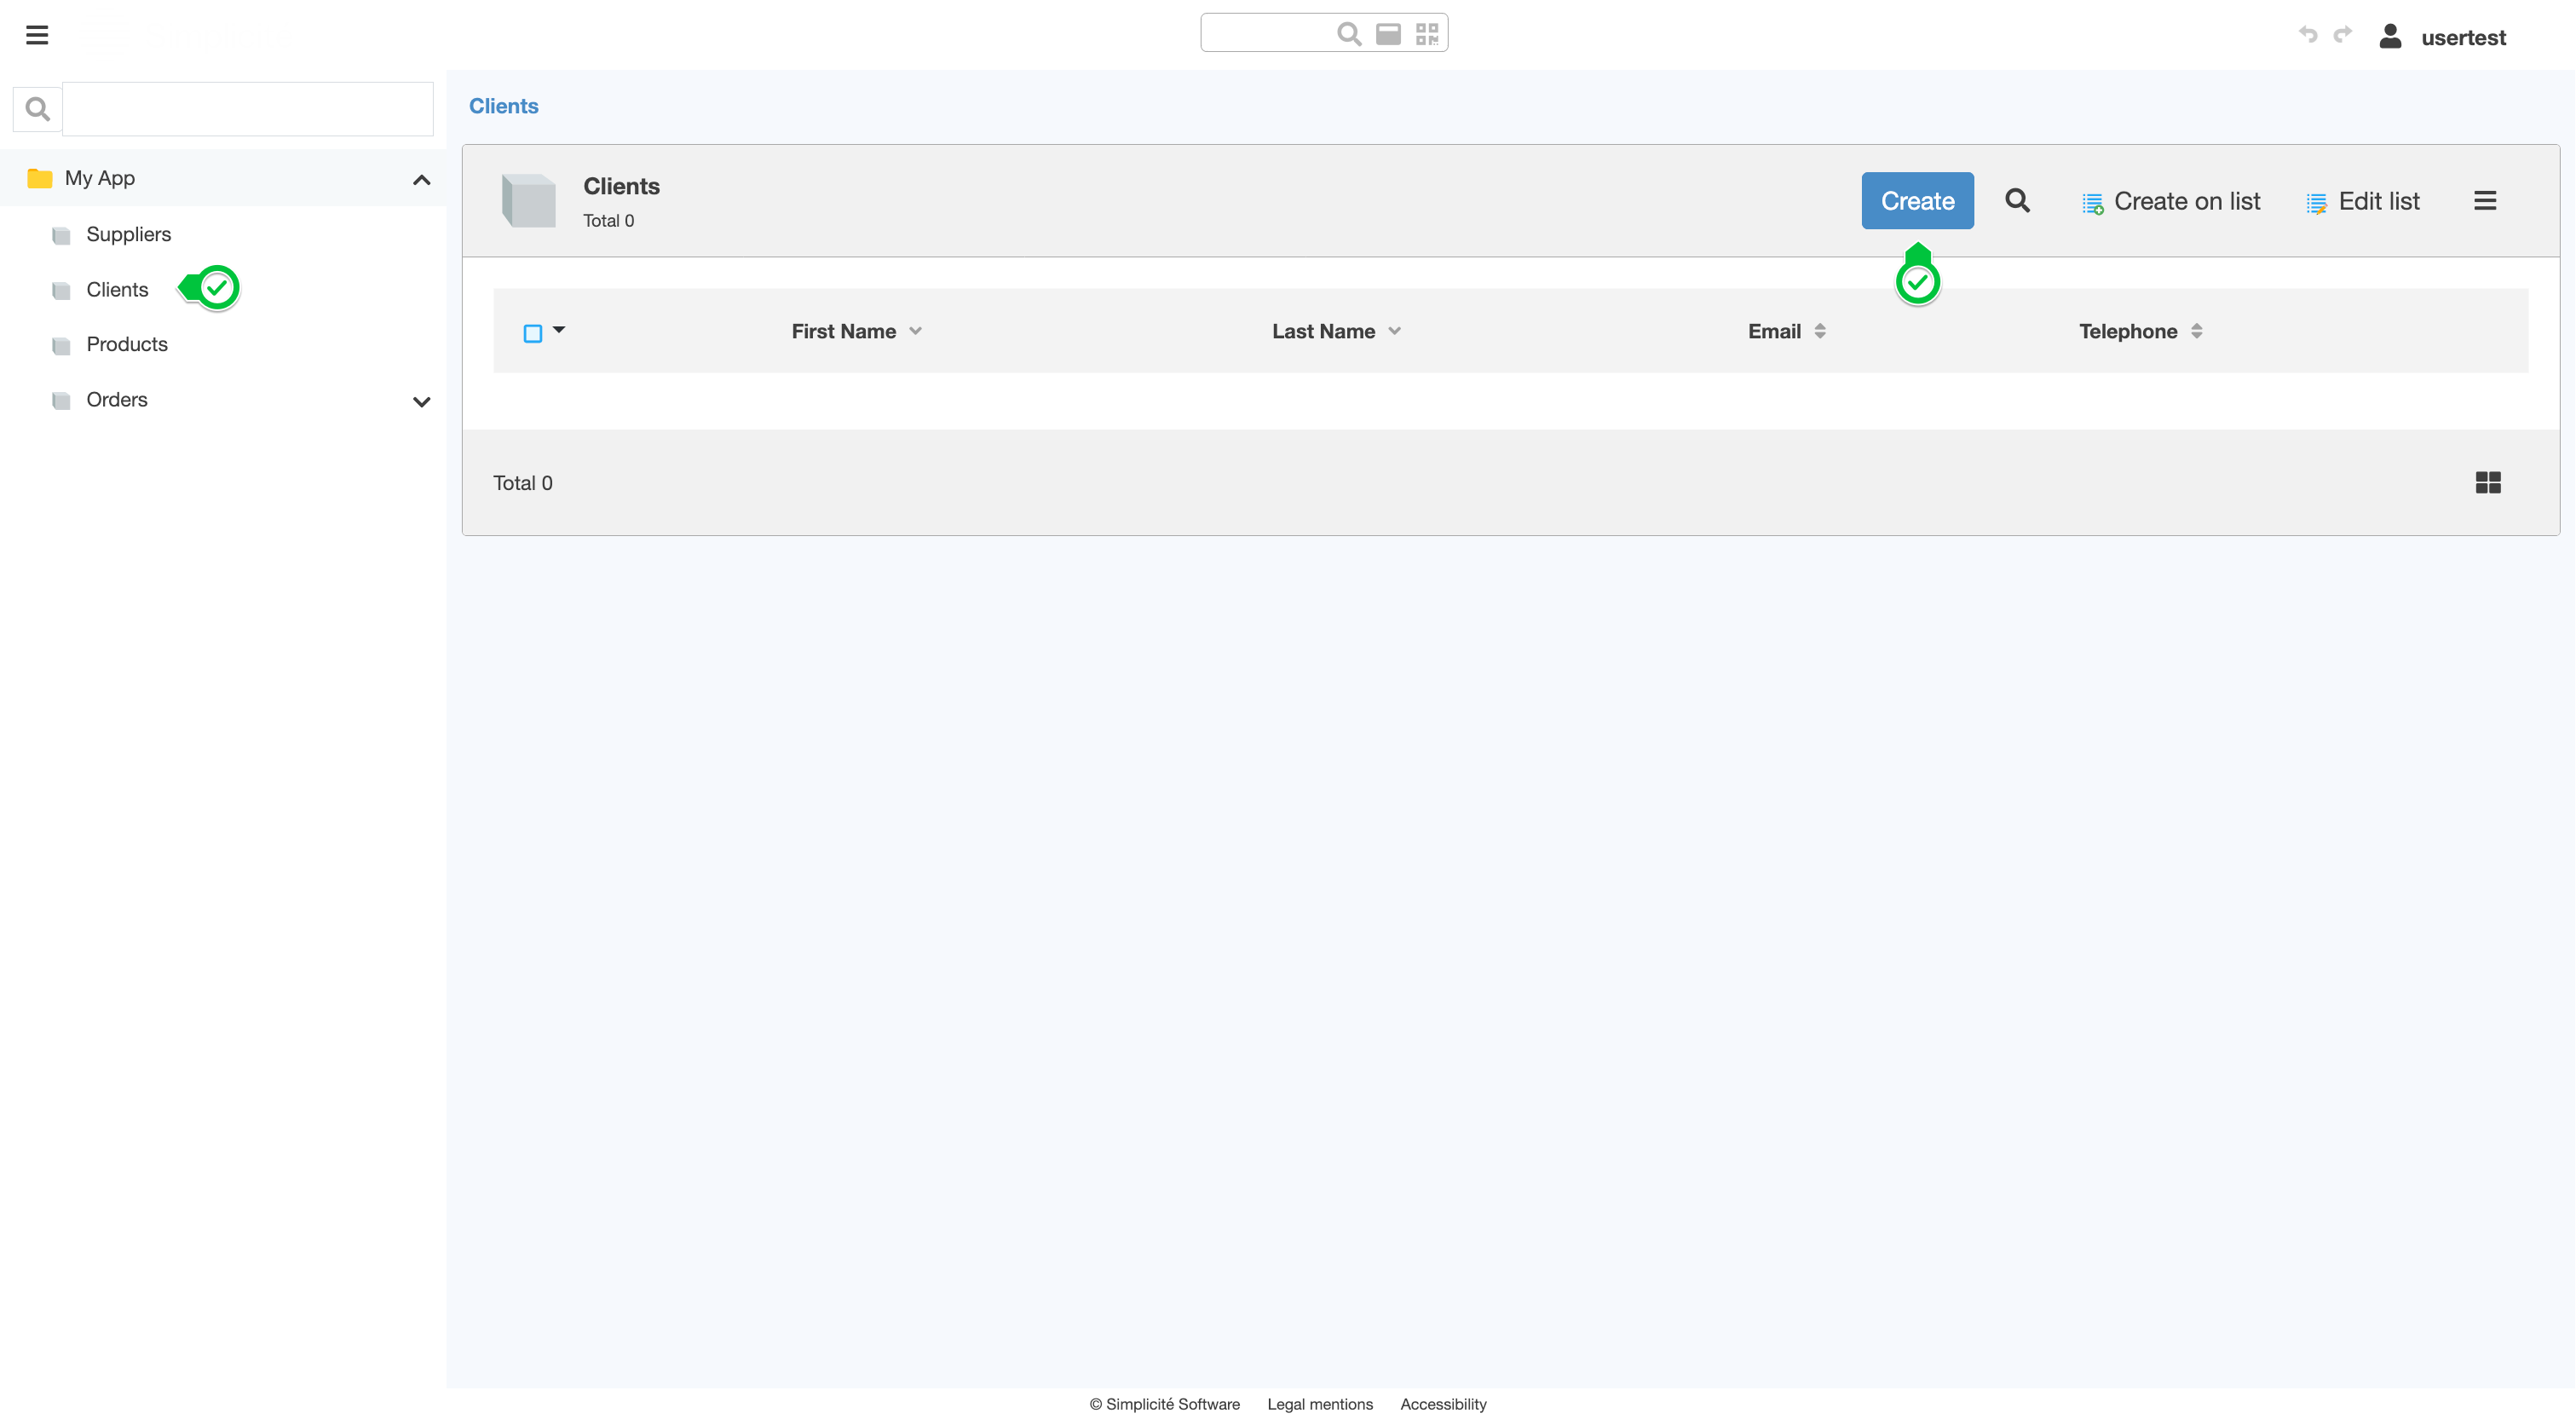
Create a Client
- Click the Clients menu
- Click Create
- Fill in the Client information like so :
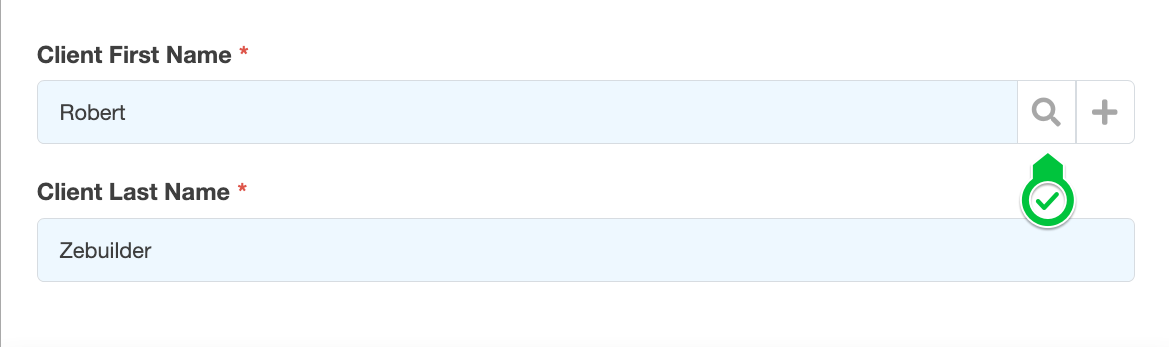
- First Name : Robert
- Last Name : Zebuilder
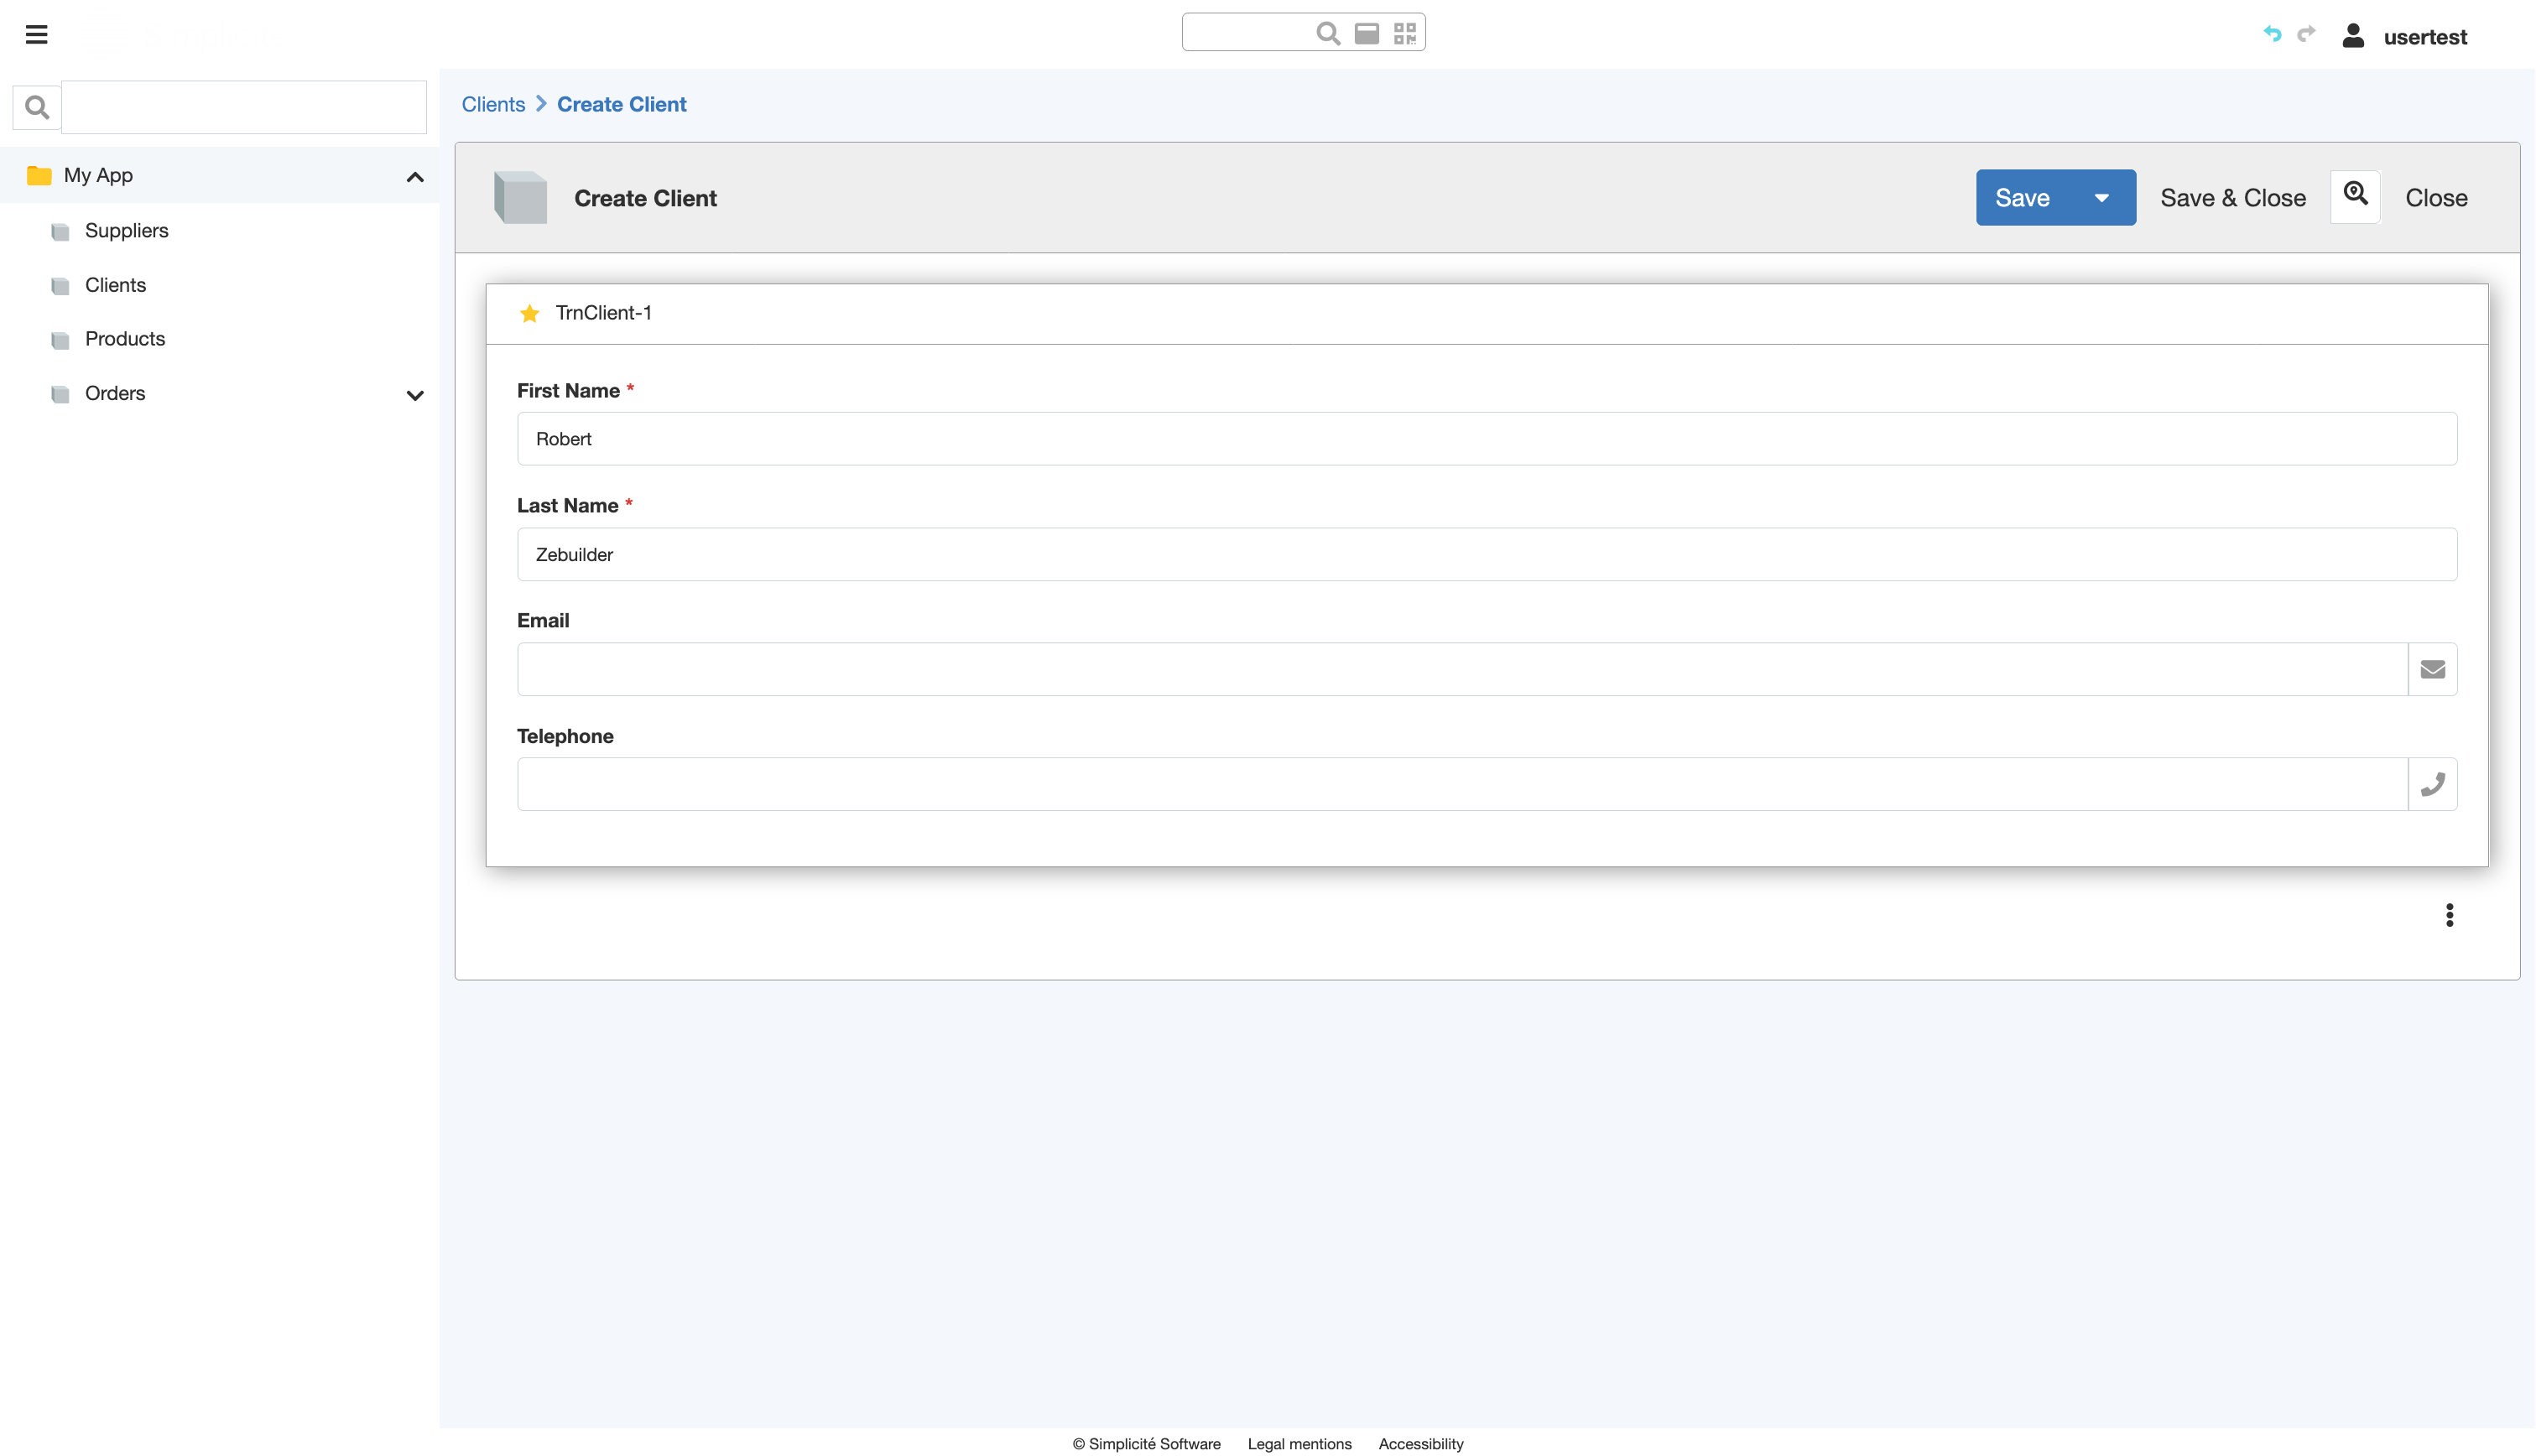
- Click Save
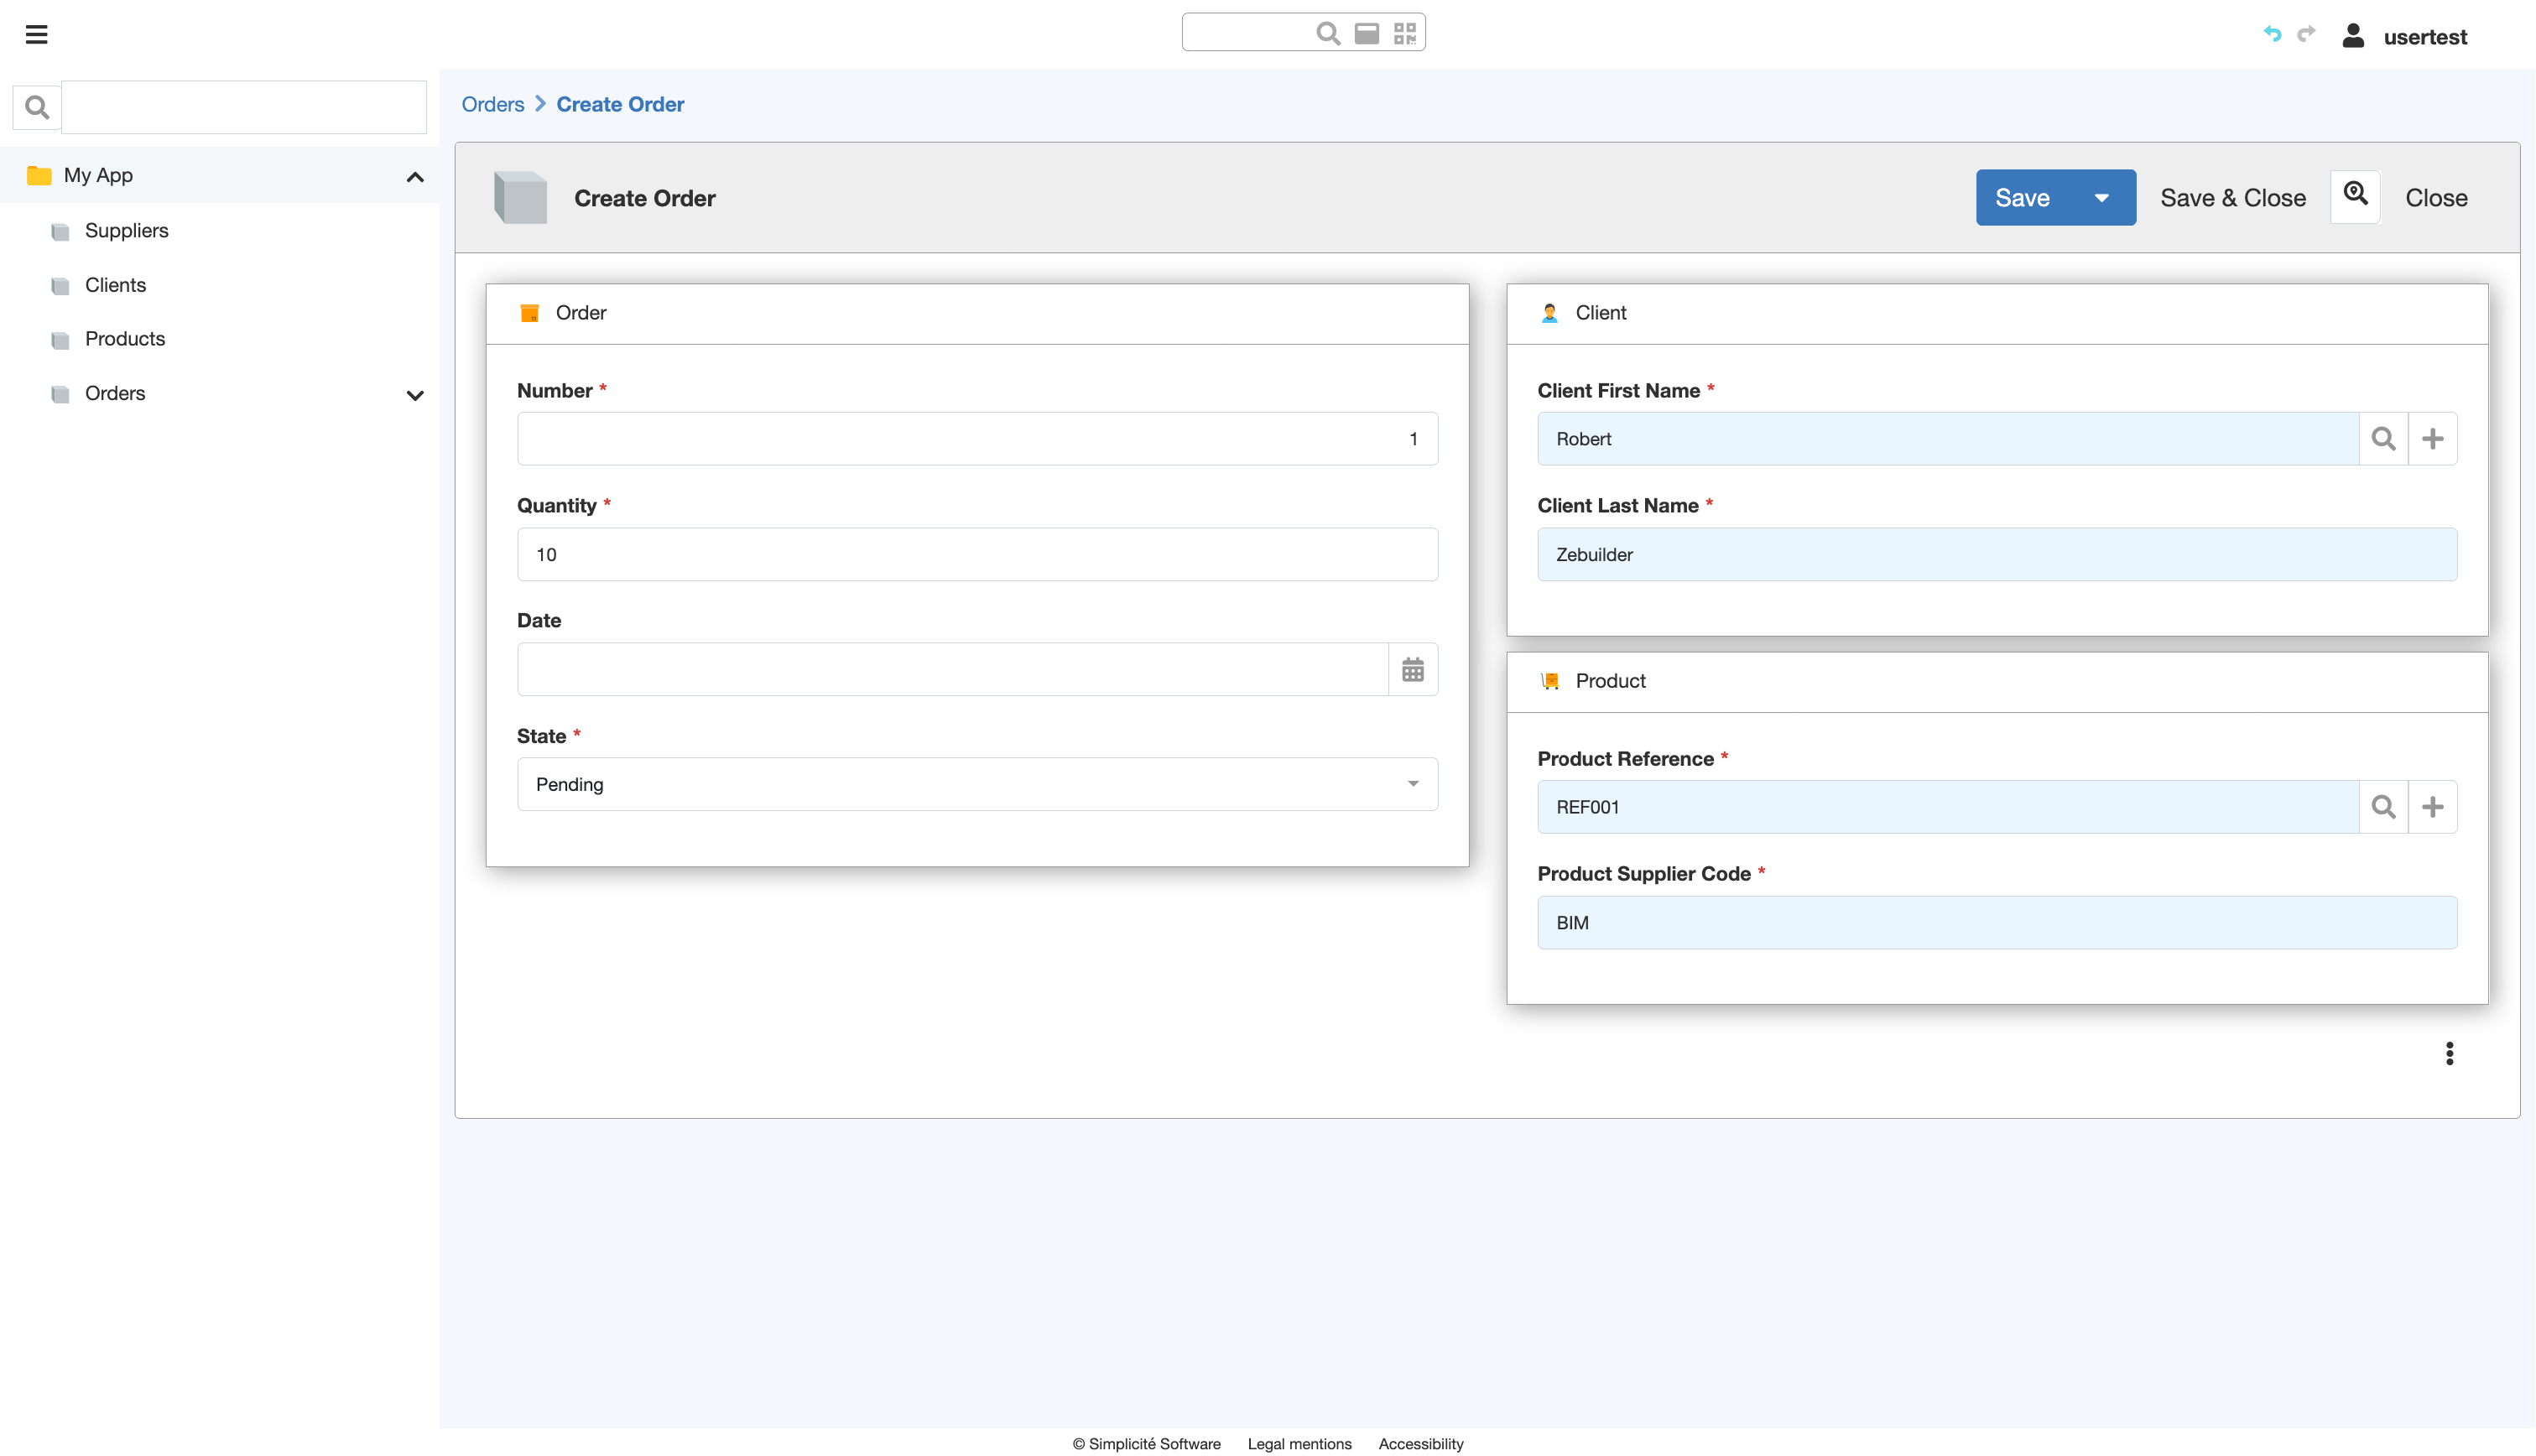
Create an Order
- Click the Orders menu
- Click Create
- Fill in the Order information like so :
- Number : 1
- Quantity : 10
- Client First Name :
- Click the magnifying glass icon
- Select a Client
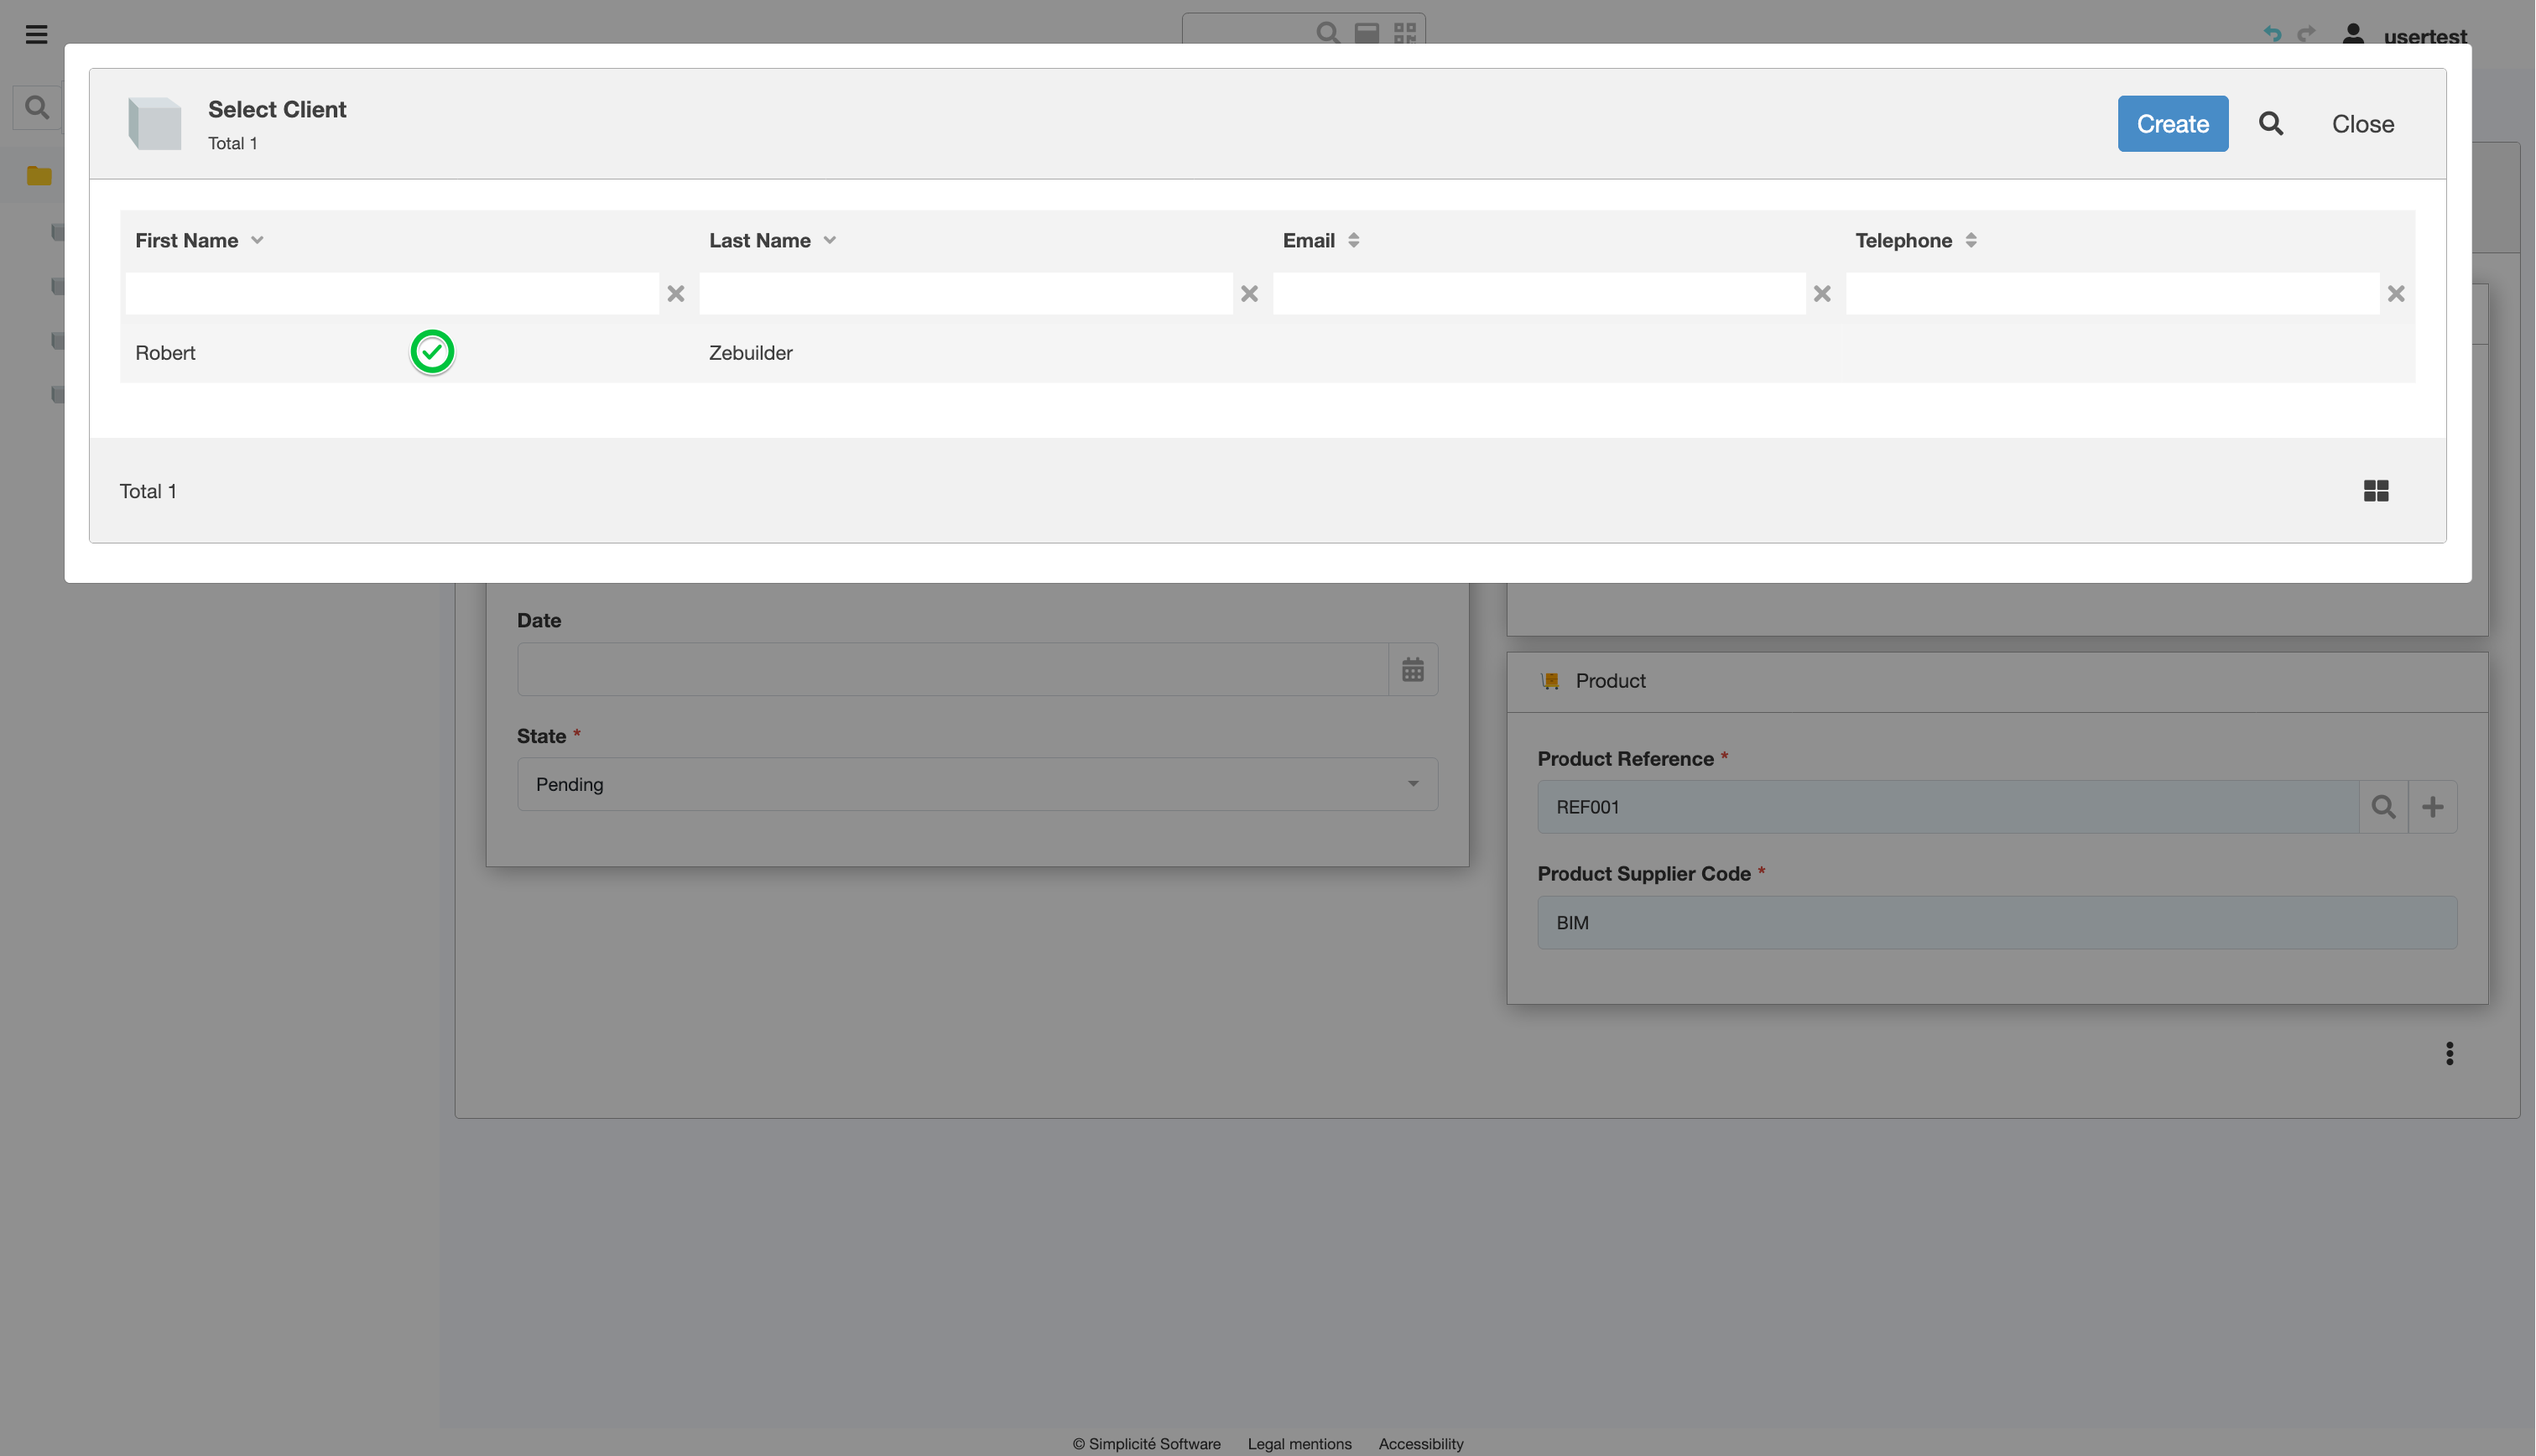
- Click the magnifying glass icon
- Product Reference :
- Click the magnifying glass icon
- Select a Product
- Click Save