Building the "Order Management" Training App : Creating a State model
What is a State model?
A state model defines the different statuses a business object can have and controls how it transitions between them. It enables filtered views, enforces permissions on state changes, and automates actions triggered by transitions. Setting up a state model ensures a structured workflow for business objects...
Creating a State model for the Order Business object
Adding a mandatory "State" field
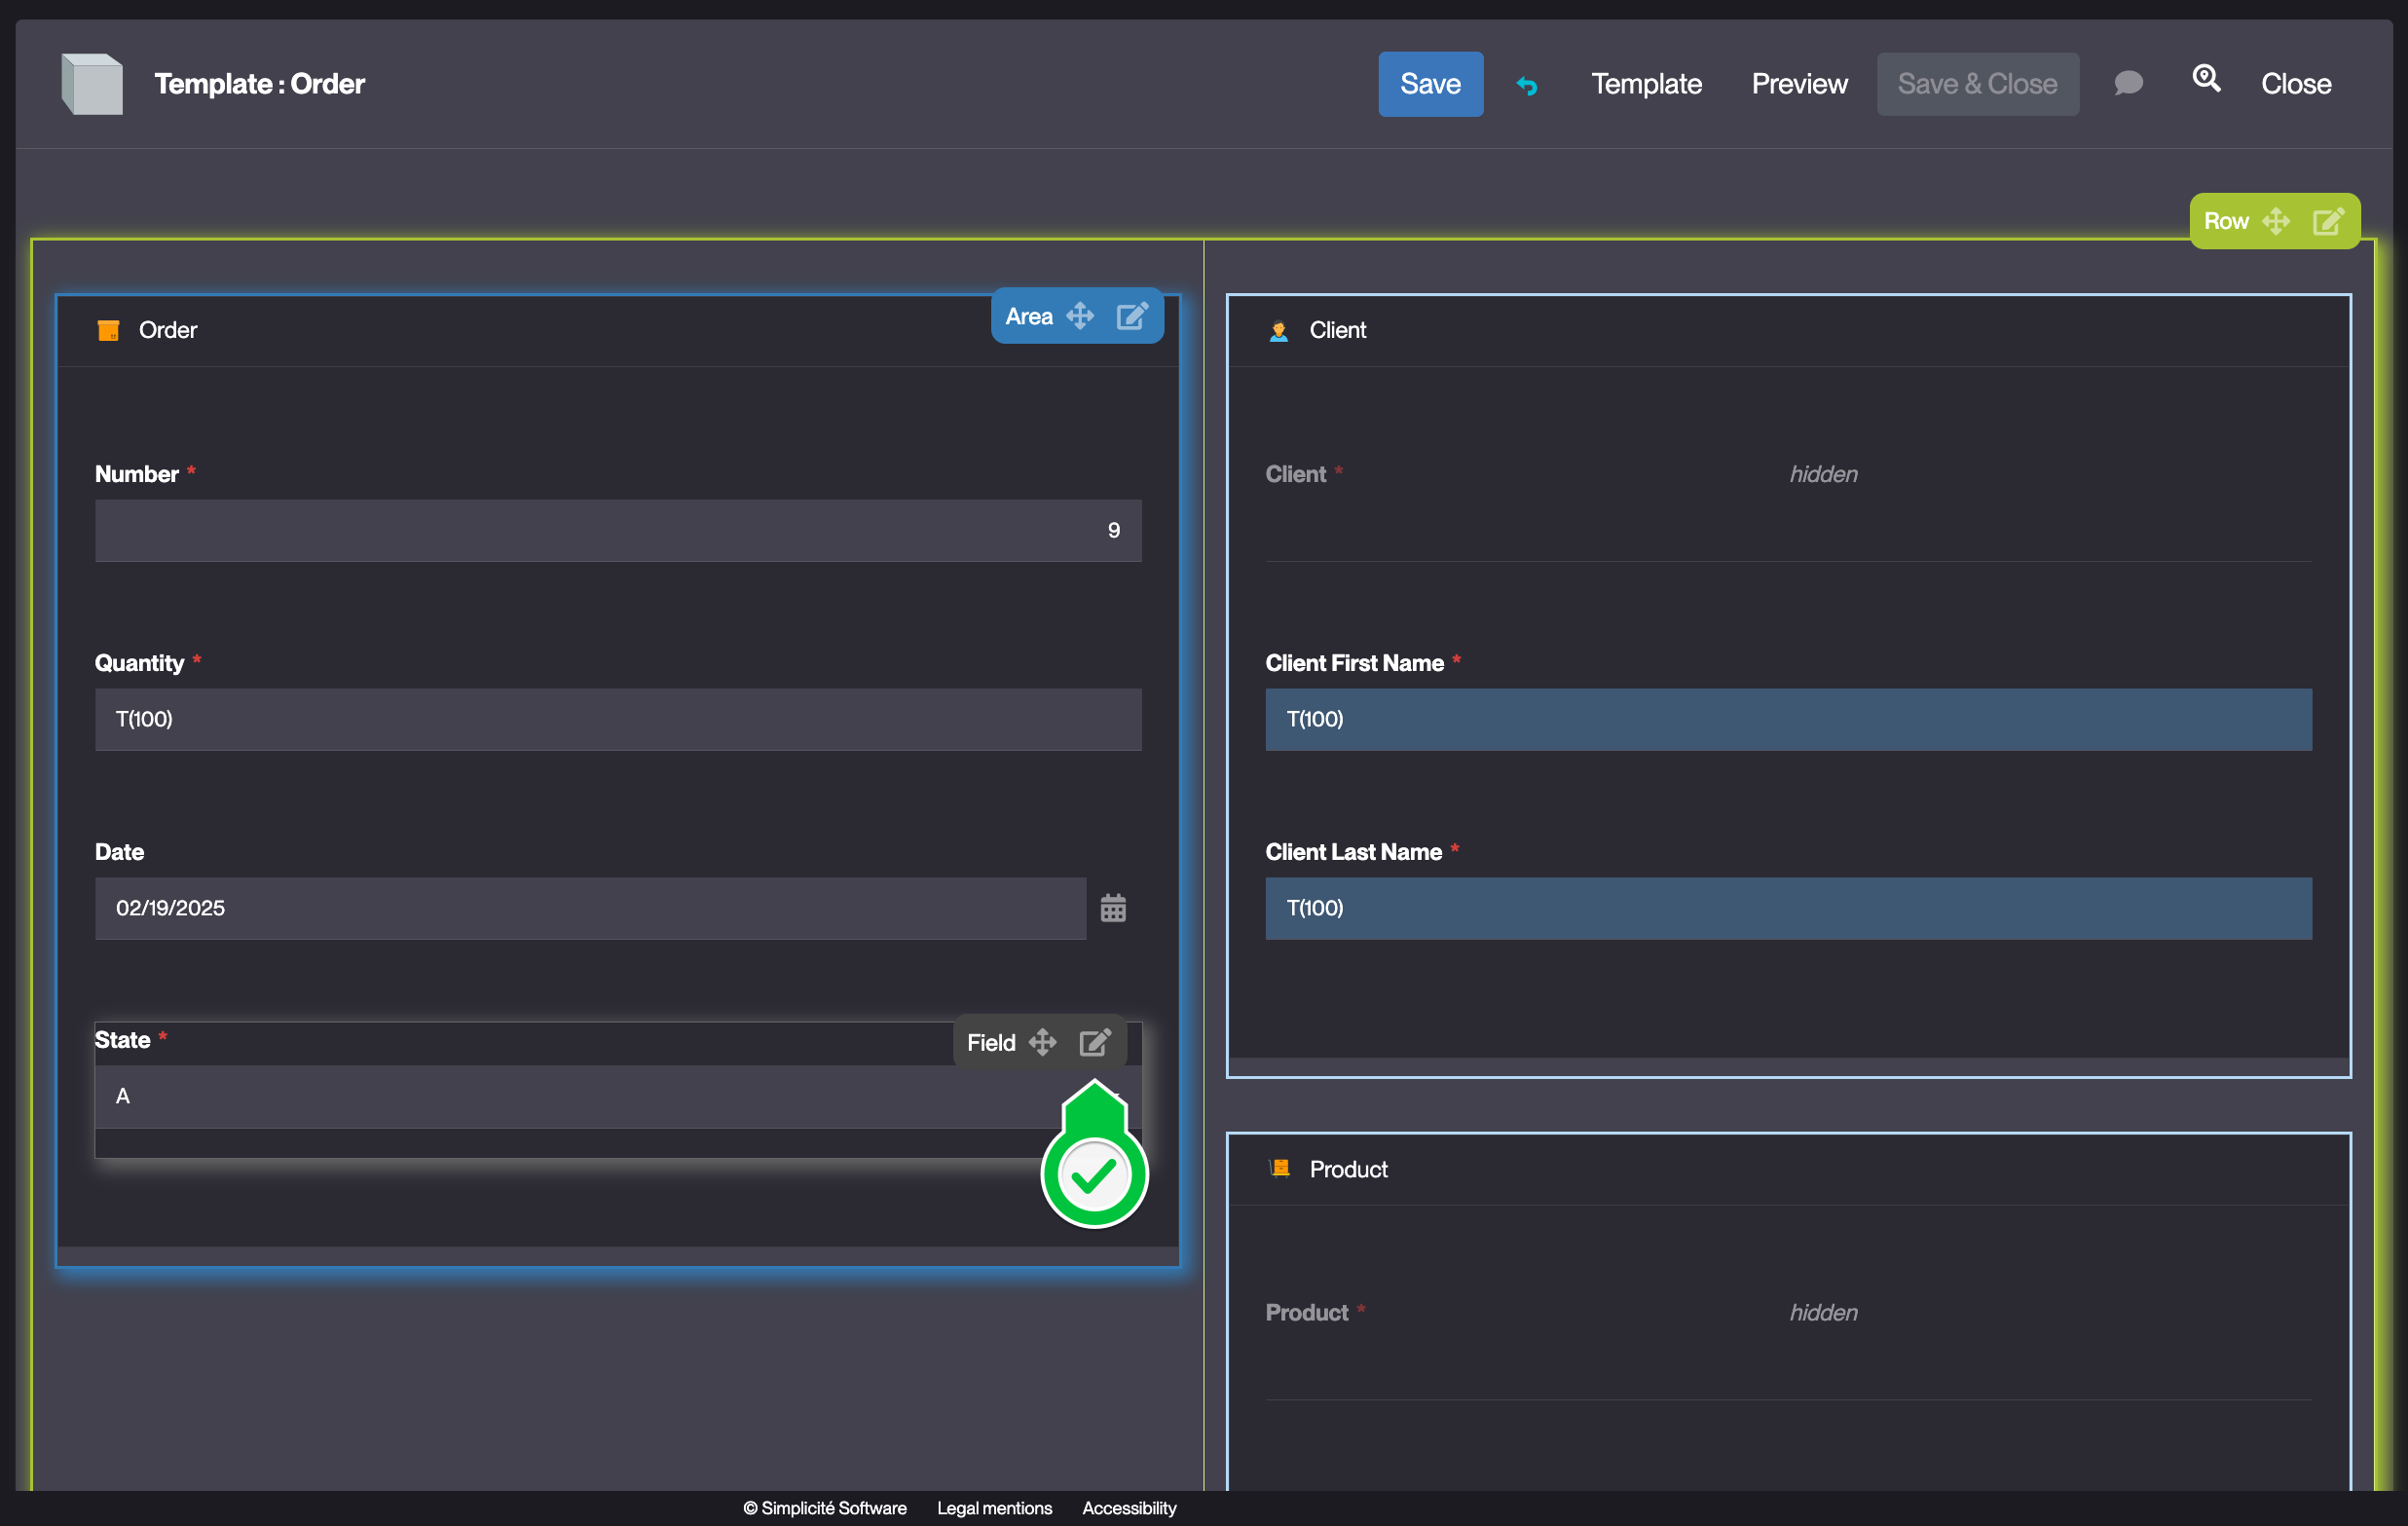
To add a State field to the Order Business object, follow the steps below :
-
Add a mandatory enumeration field to the TrnOrder Business object in the previously created "Order" Field Area
For a detailed guide on how to add a field, see Getting started : Create field
-
Fill in the Field fields like so :
- Label : State
- Logical name : trnOrdState should be auto-completed
- Physical name : trn_ord_state should be auto-completed
- Required : Toggled
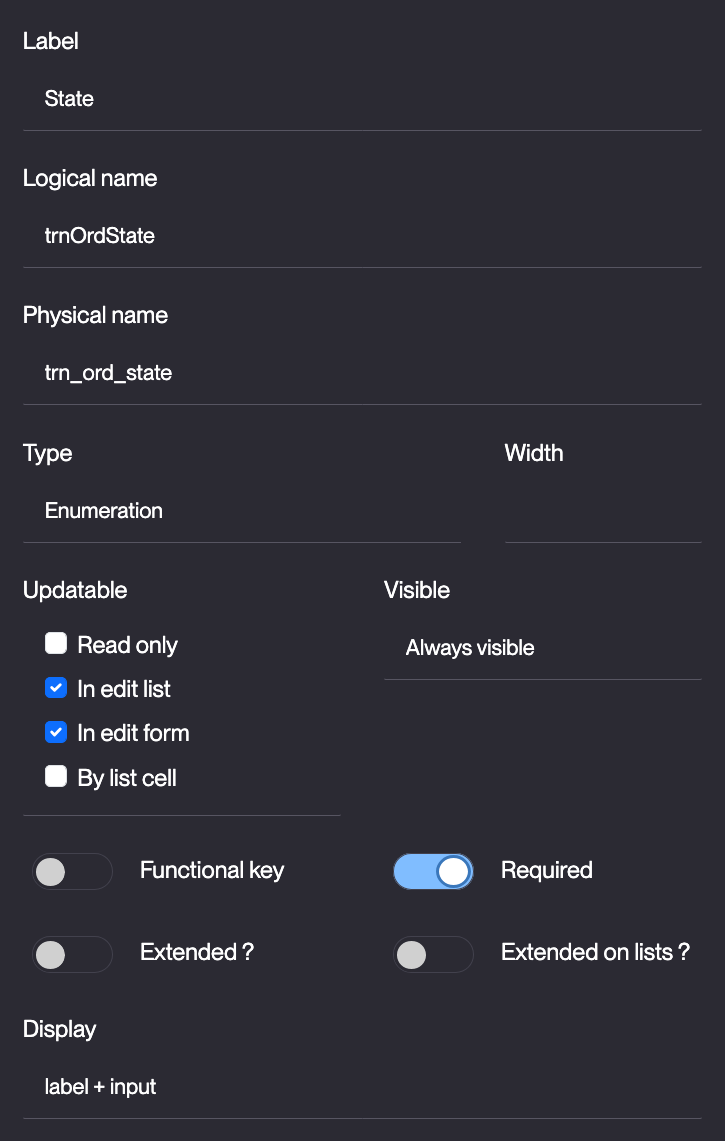
-
Click Save
-
Hover over the created State field and click the Edit icon
-
Click Edit list
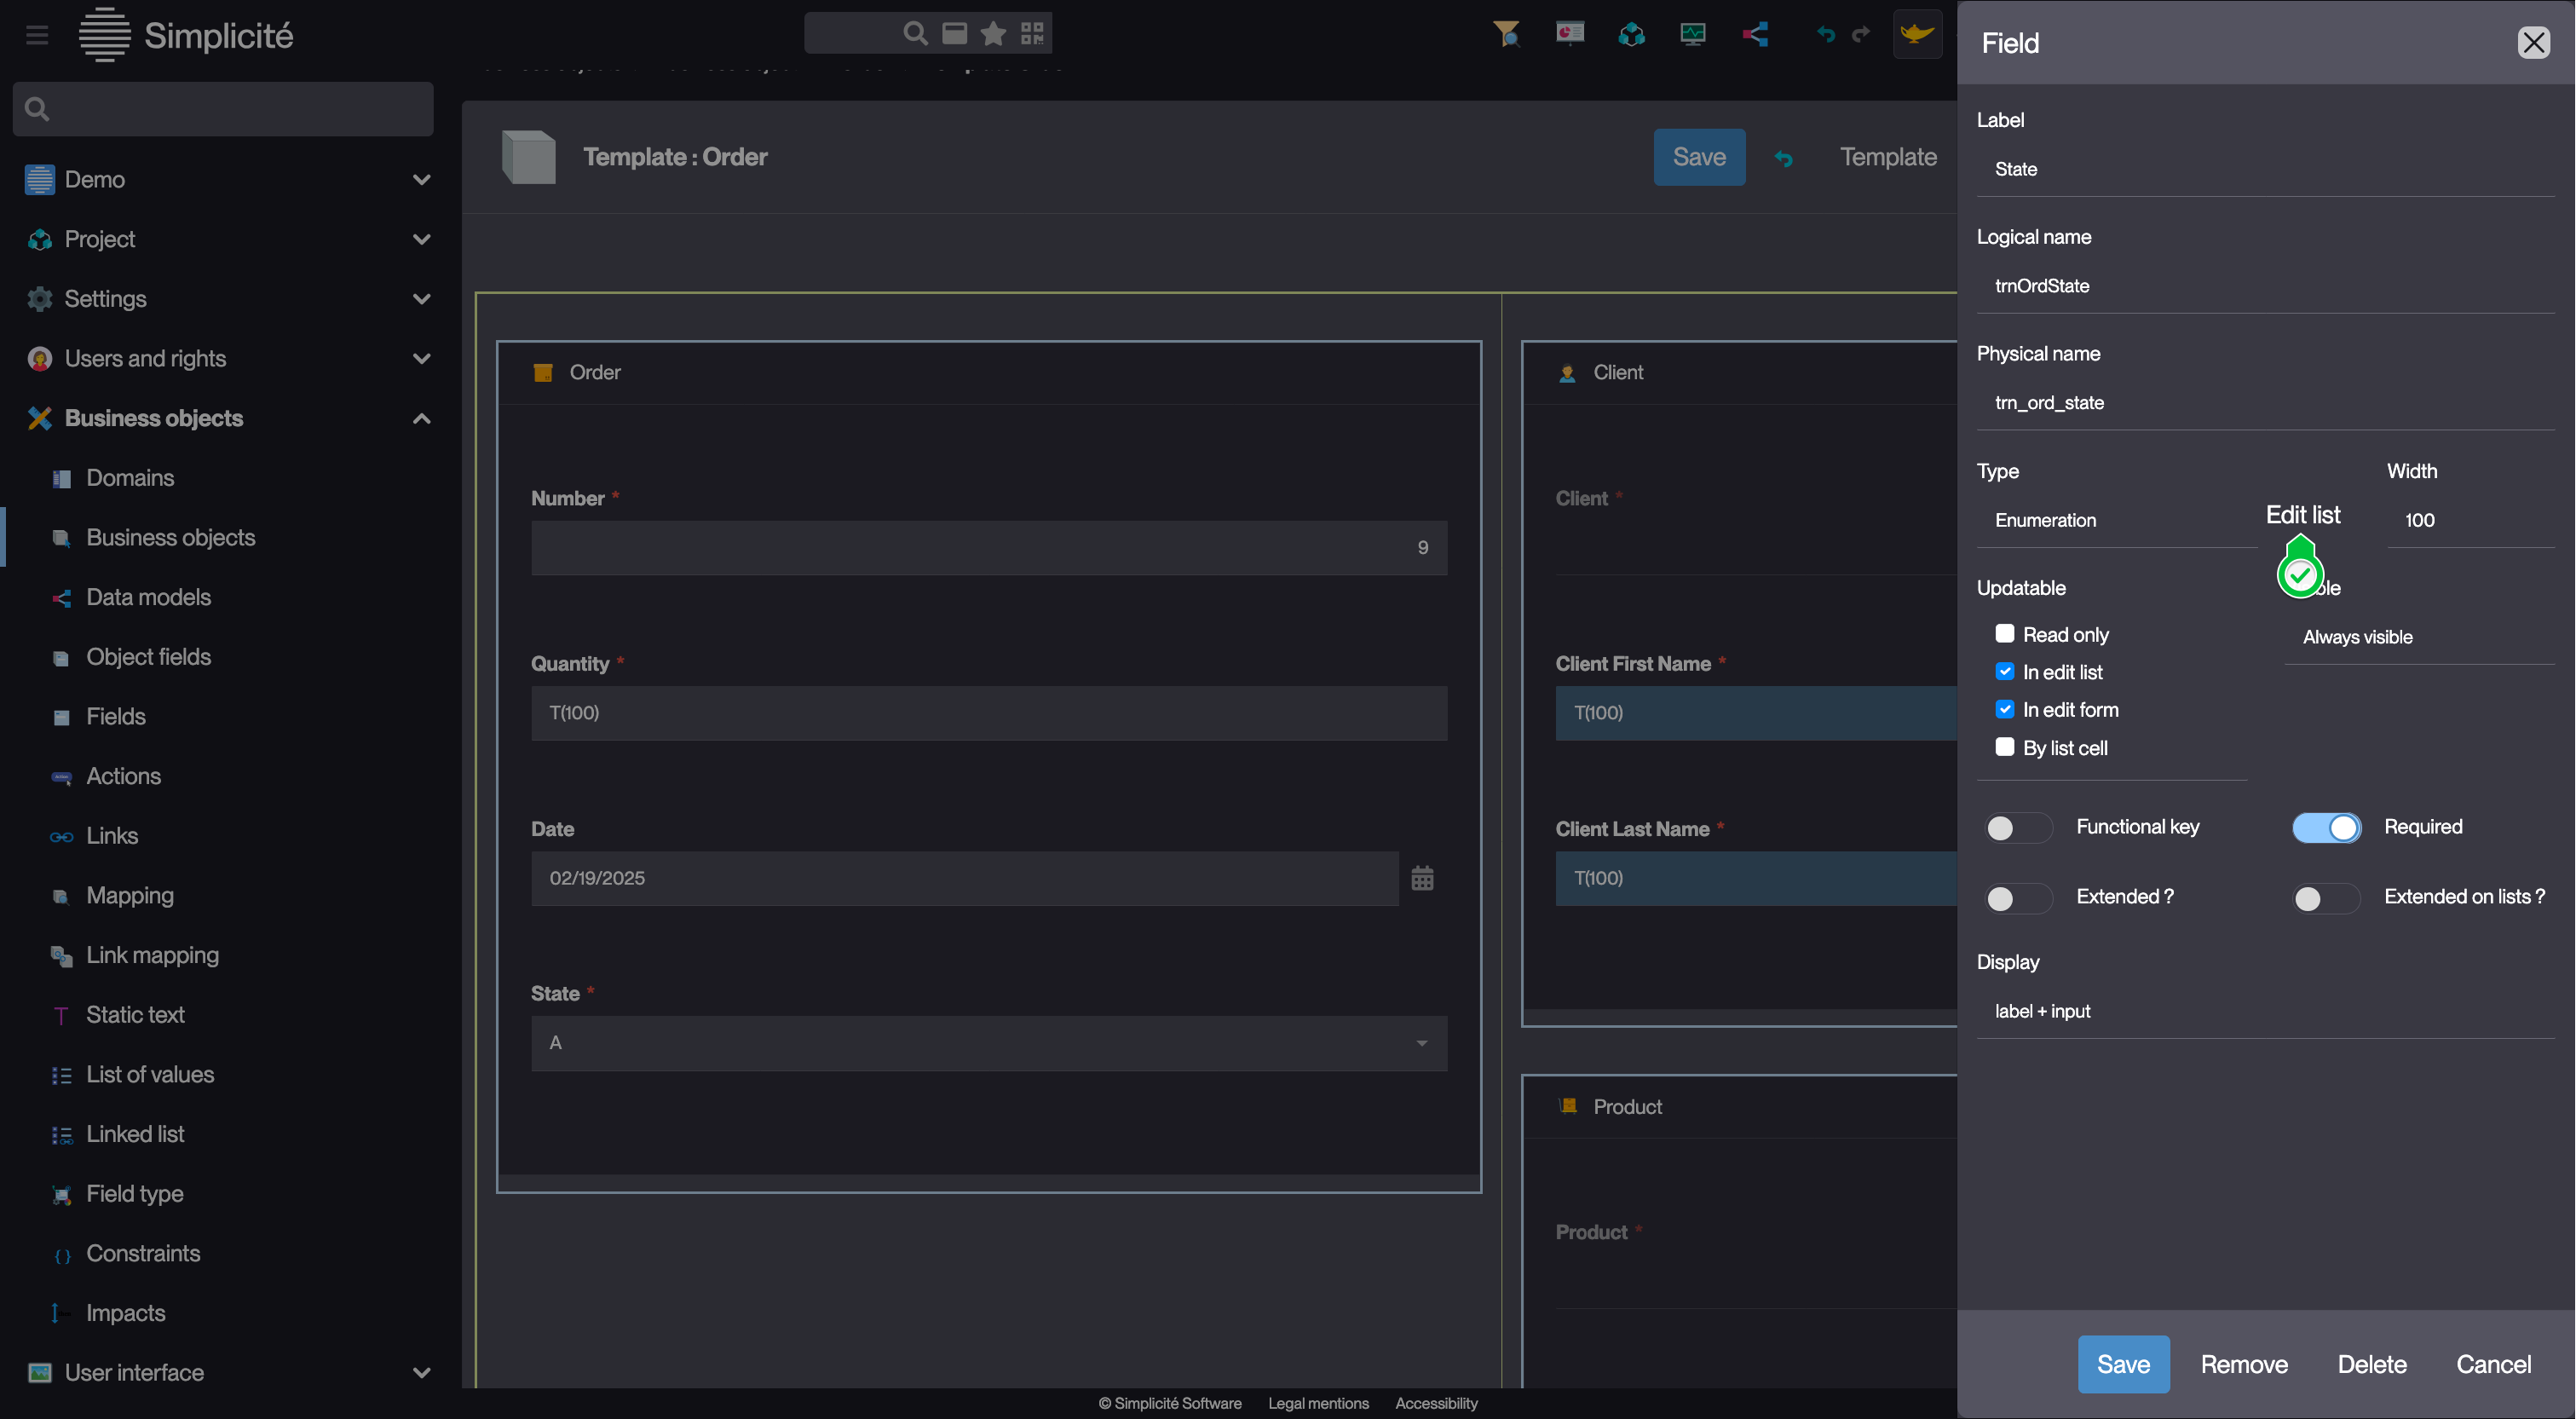
-
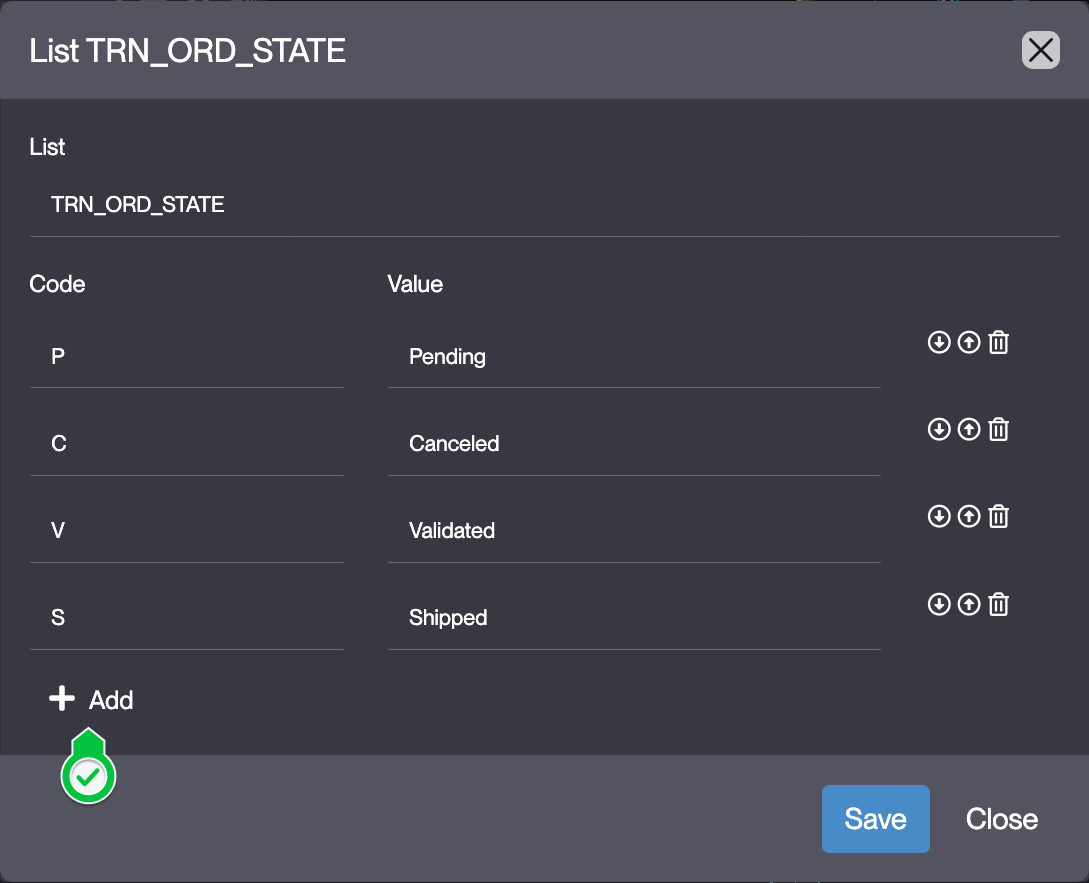
Fill in the List items like so :
Code Value P Pending C Canceled V Validated S Shipped Click Add to add an element to the List
-
Click Save
-
Close the Template editor
Creating the State model based on the "State field"
To create a State model for the the Order Business object, follow the steps below :
-
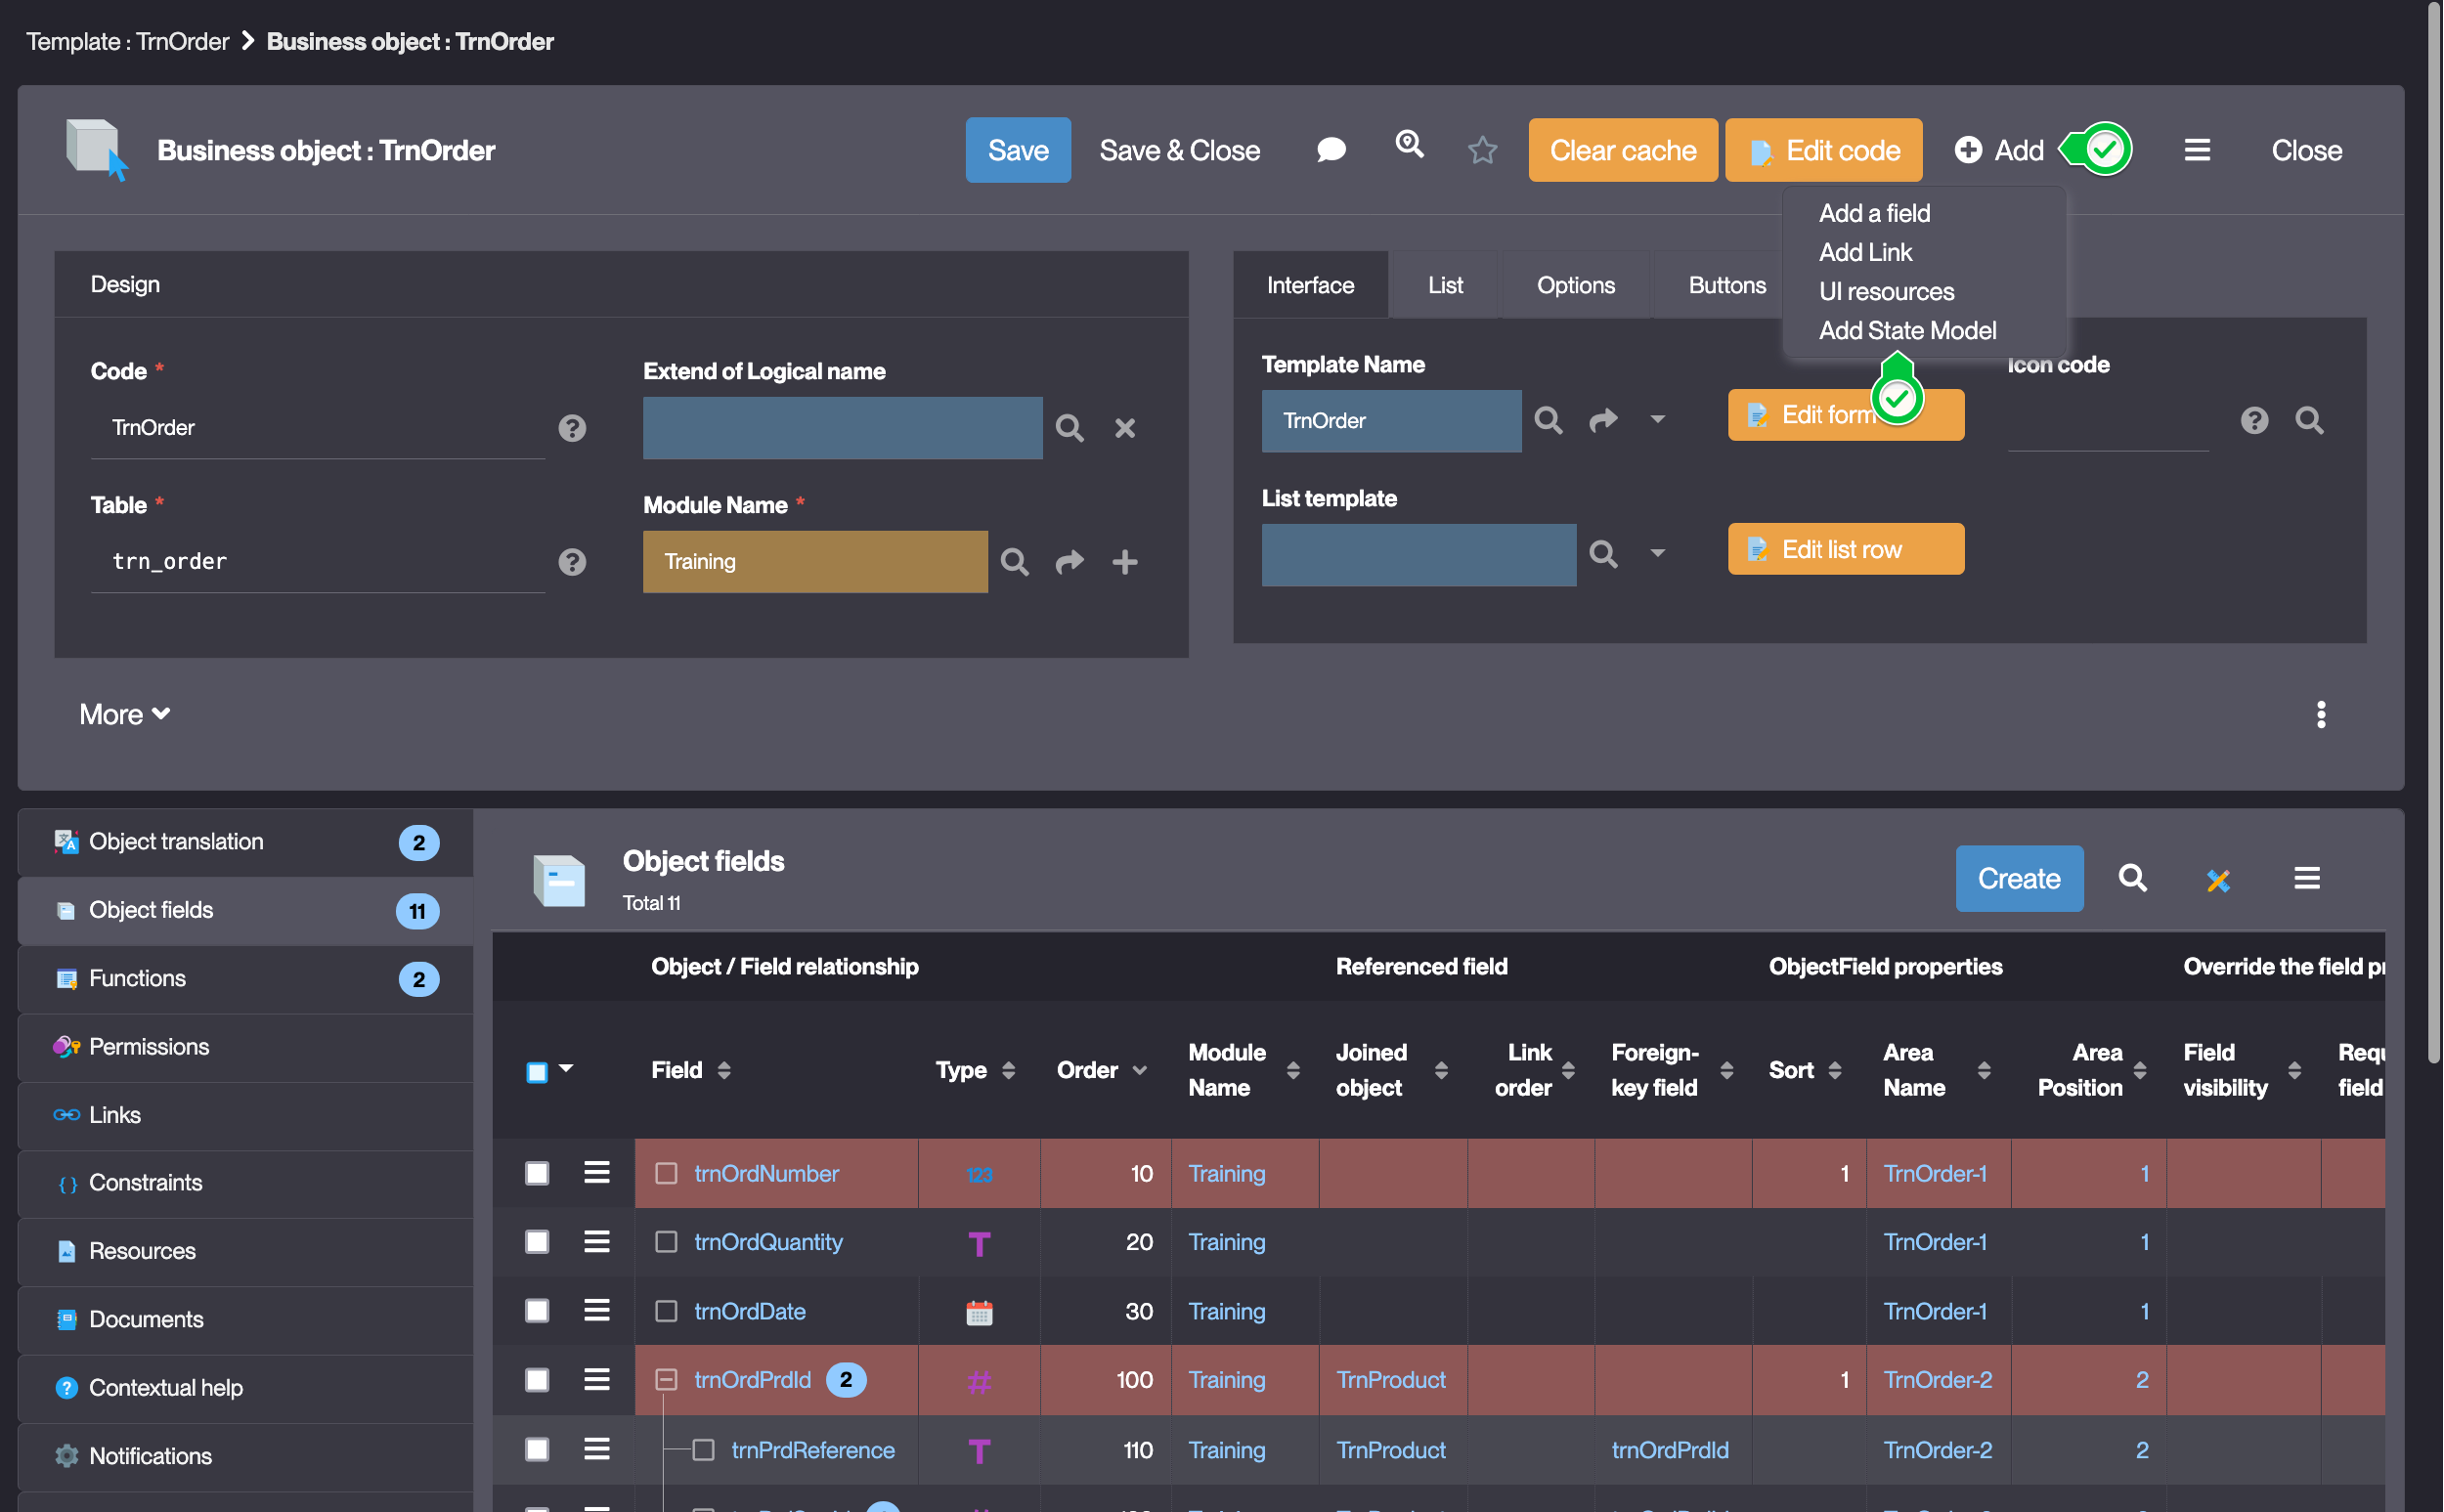
On the "TrnOrder" Business object's form, click + Add > Add State Model
-
Select the enumeration field that the State model is based on
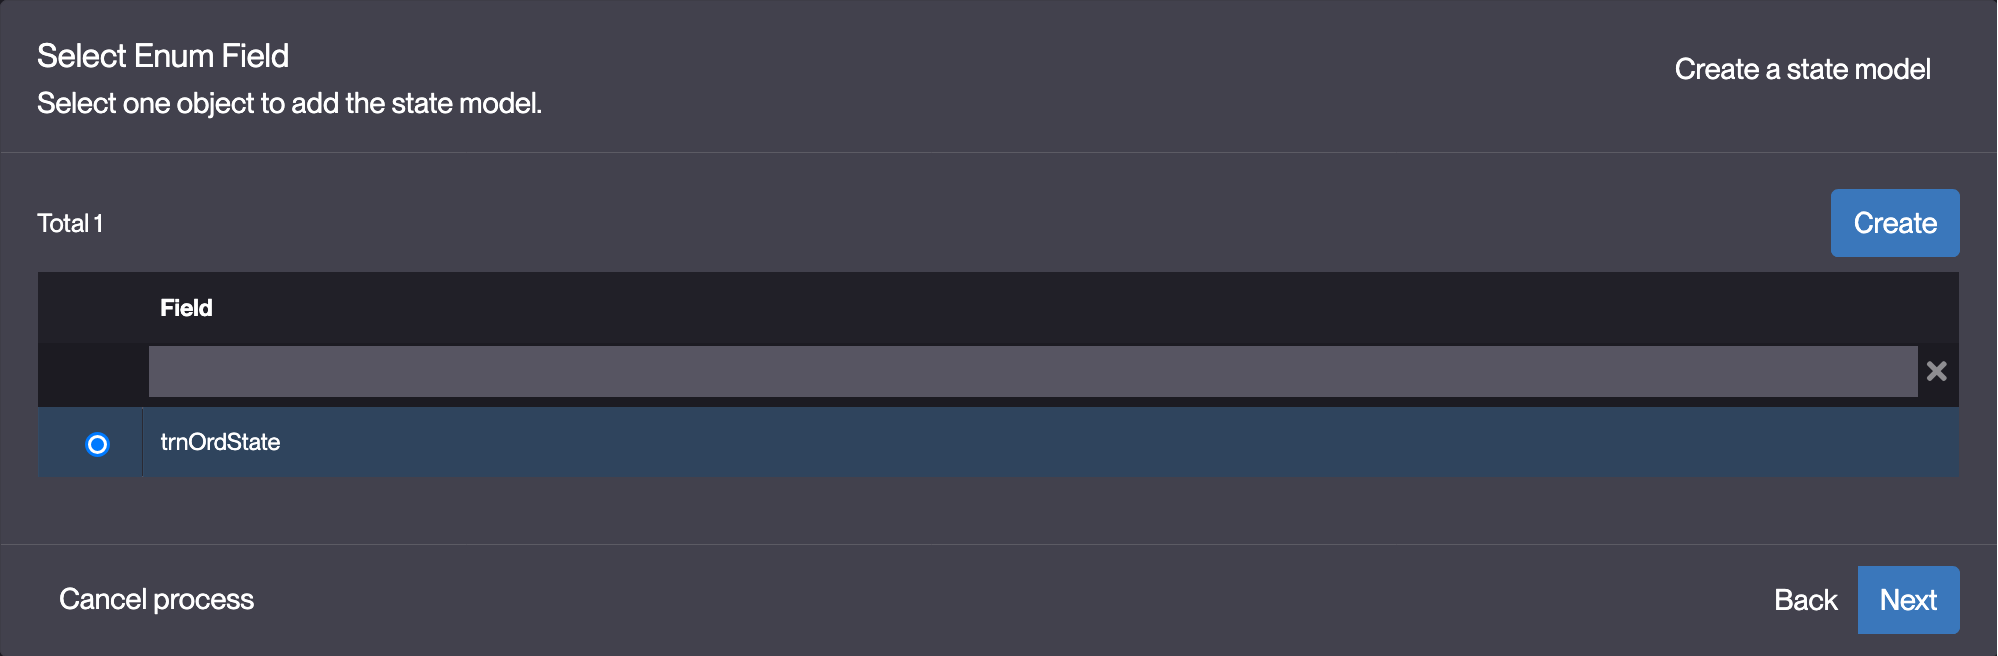
By default "trnOrdState" is selected
-
Click Next
-
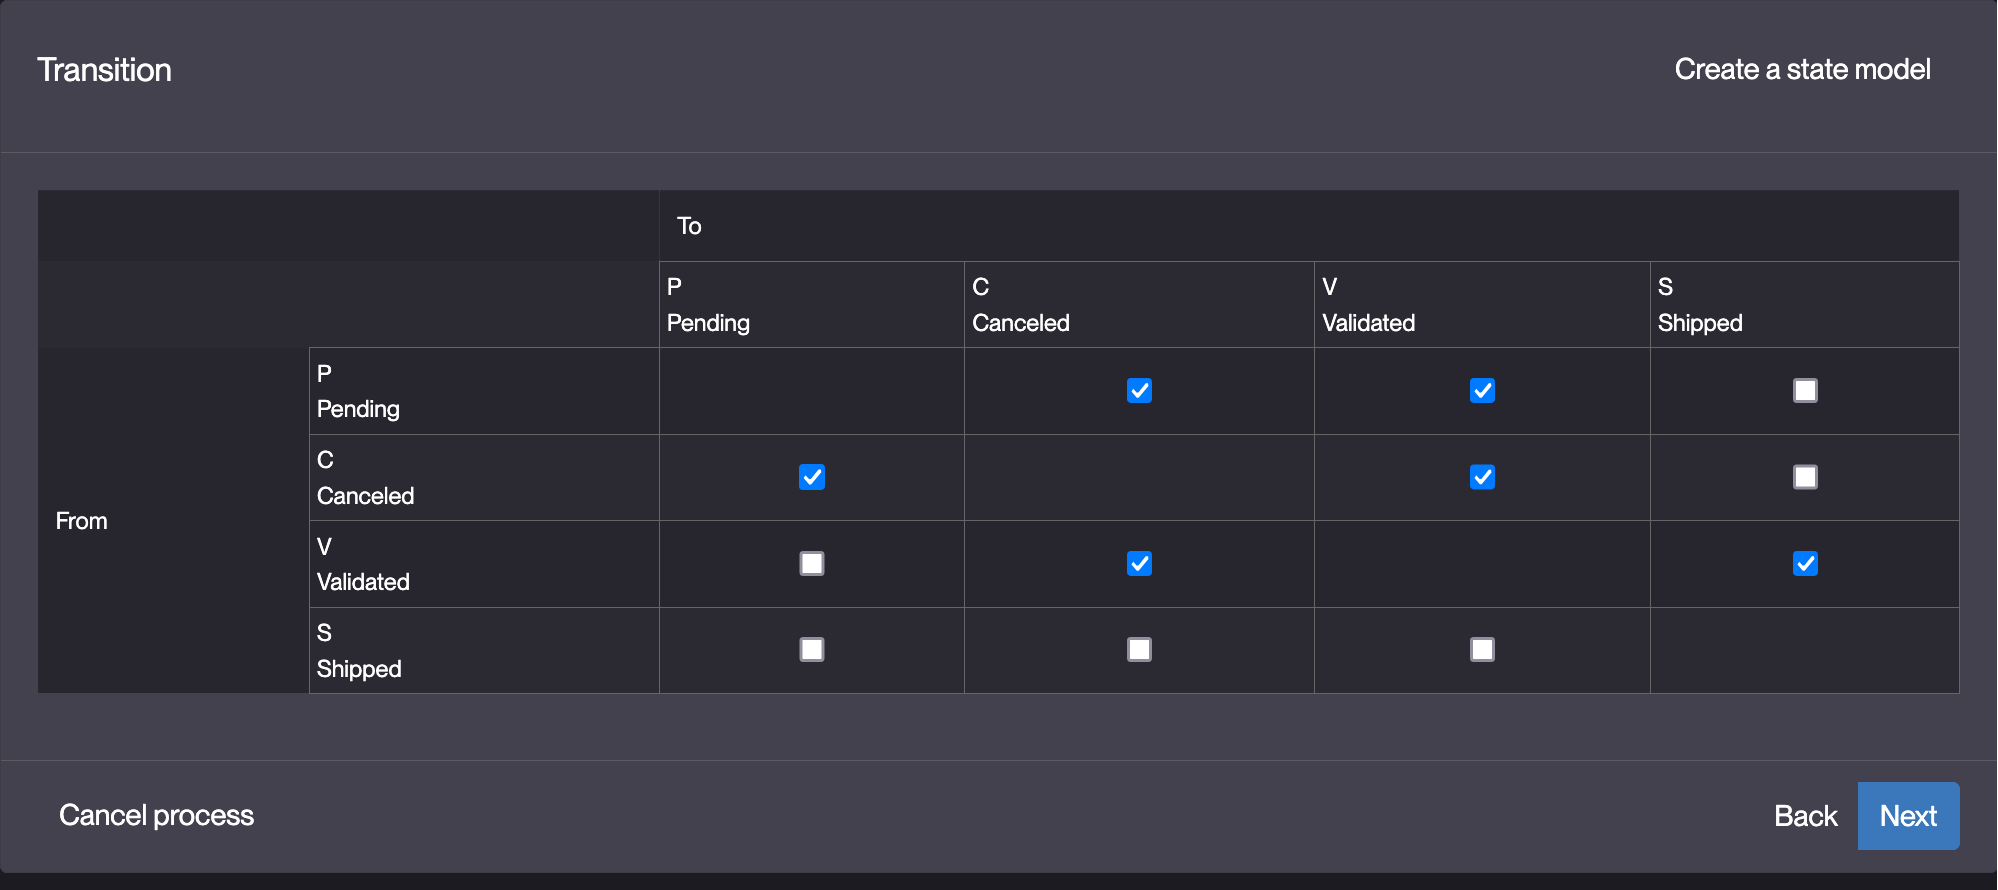
Fill in the State transition matrix like so :
-
Click Next
-
Grant every State transition to the TRN_SUPERADMIN Group
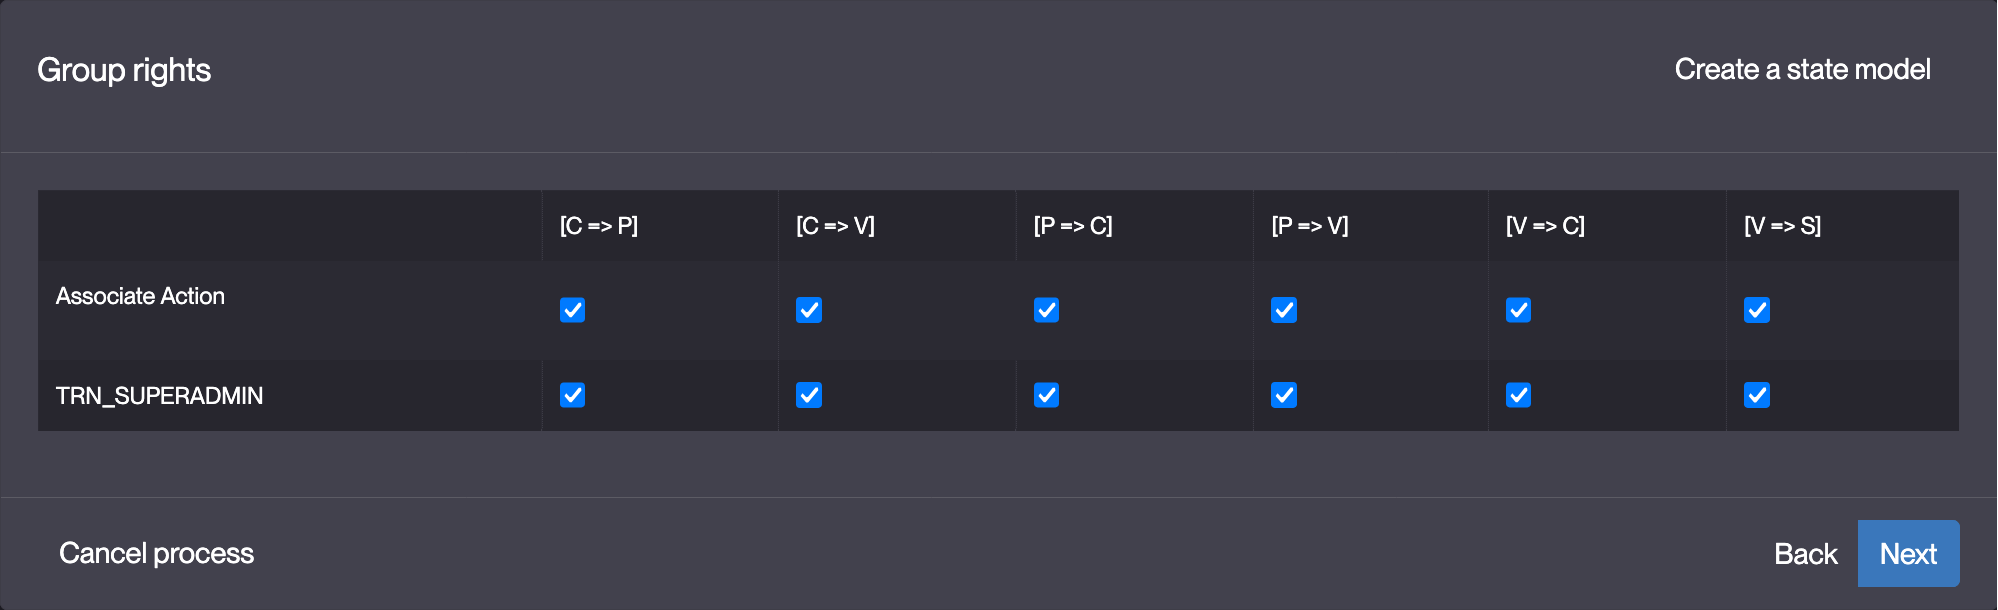
The Associate Action checkbox creates a button for each State transition
-
Click Next
-
Fill in the Translations (button labels) for the State transitions like so :
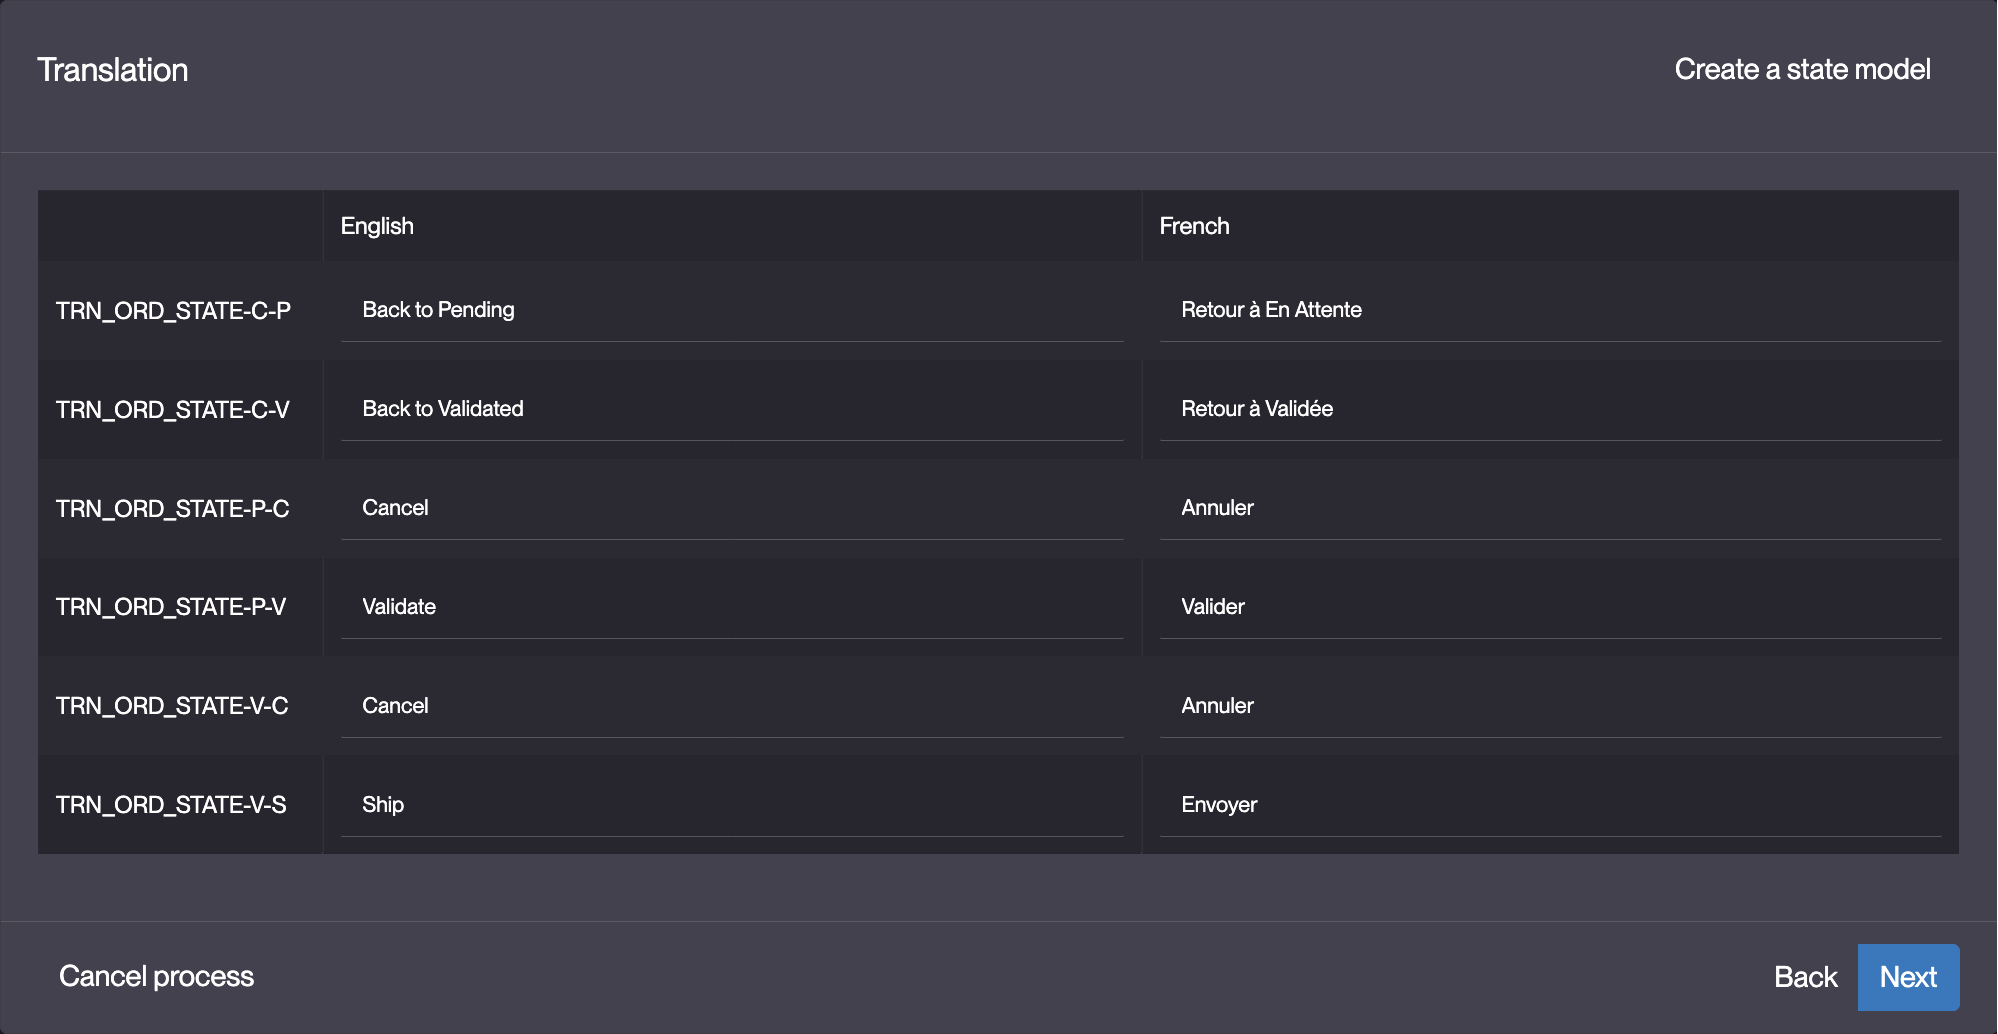
Code English French TRN_ORD_STATE-C-P Back to Pending Retour à En Attente TRN_ORD_STATE-C-V Back to Validated Retour à Validée TRN_ORD_STATE-P-C Cancel Annuler TRN_ORD_STATE-P-V Validate Valider TRN_ORD_STATE-V-C Cancel Annuler TRN_ORD_STATE-V-S Ship Envoyer -
Click Next
SuccessA state model has been added to the TrnOrder Business object.
Optional Add a States navbar in form
-
On the "TrnOrder" Business object's form, click Edit form. This will open the template editor.

-
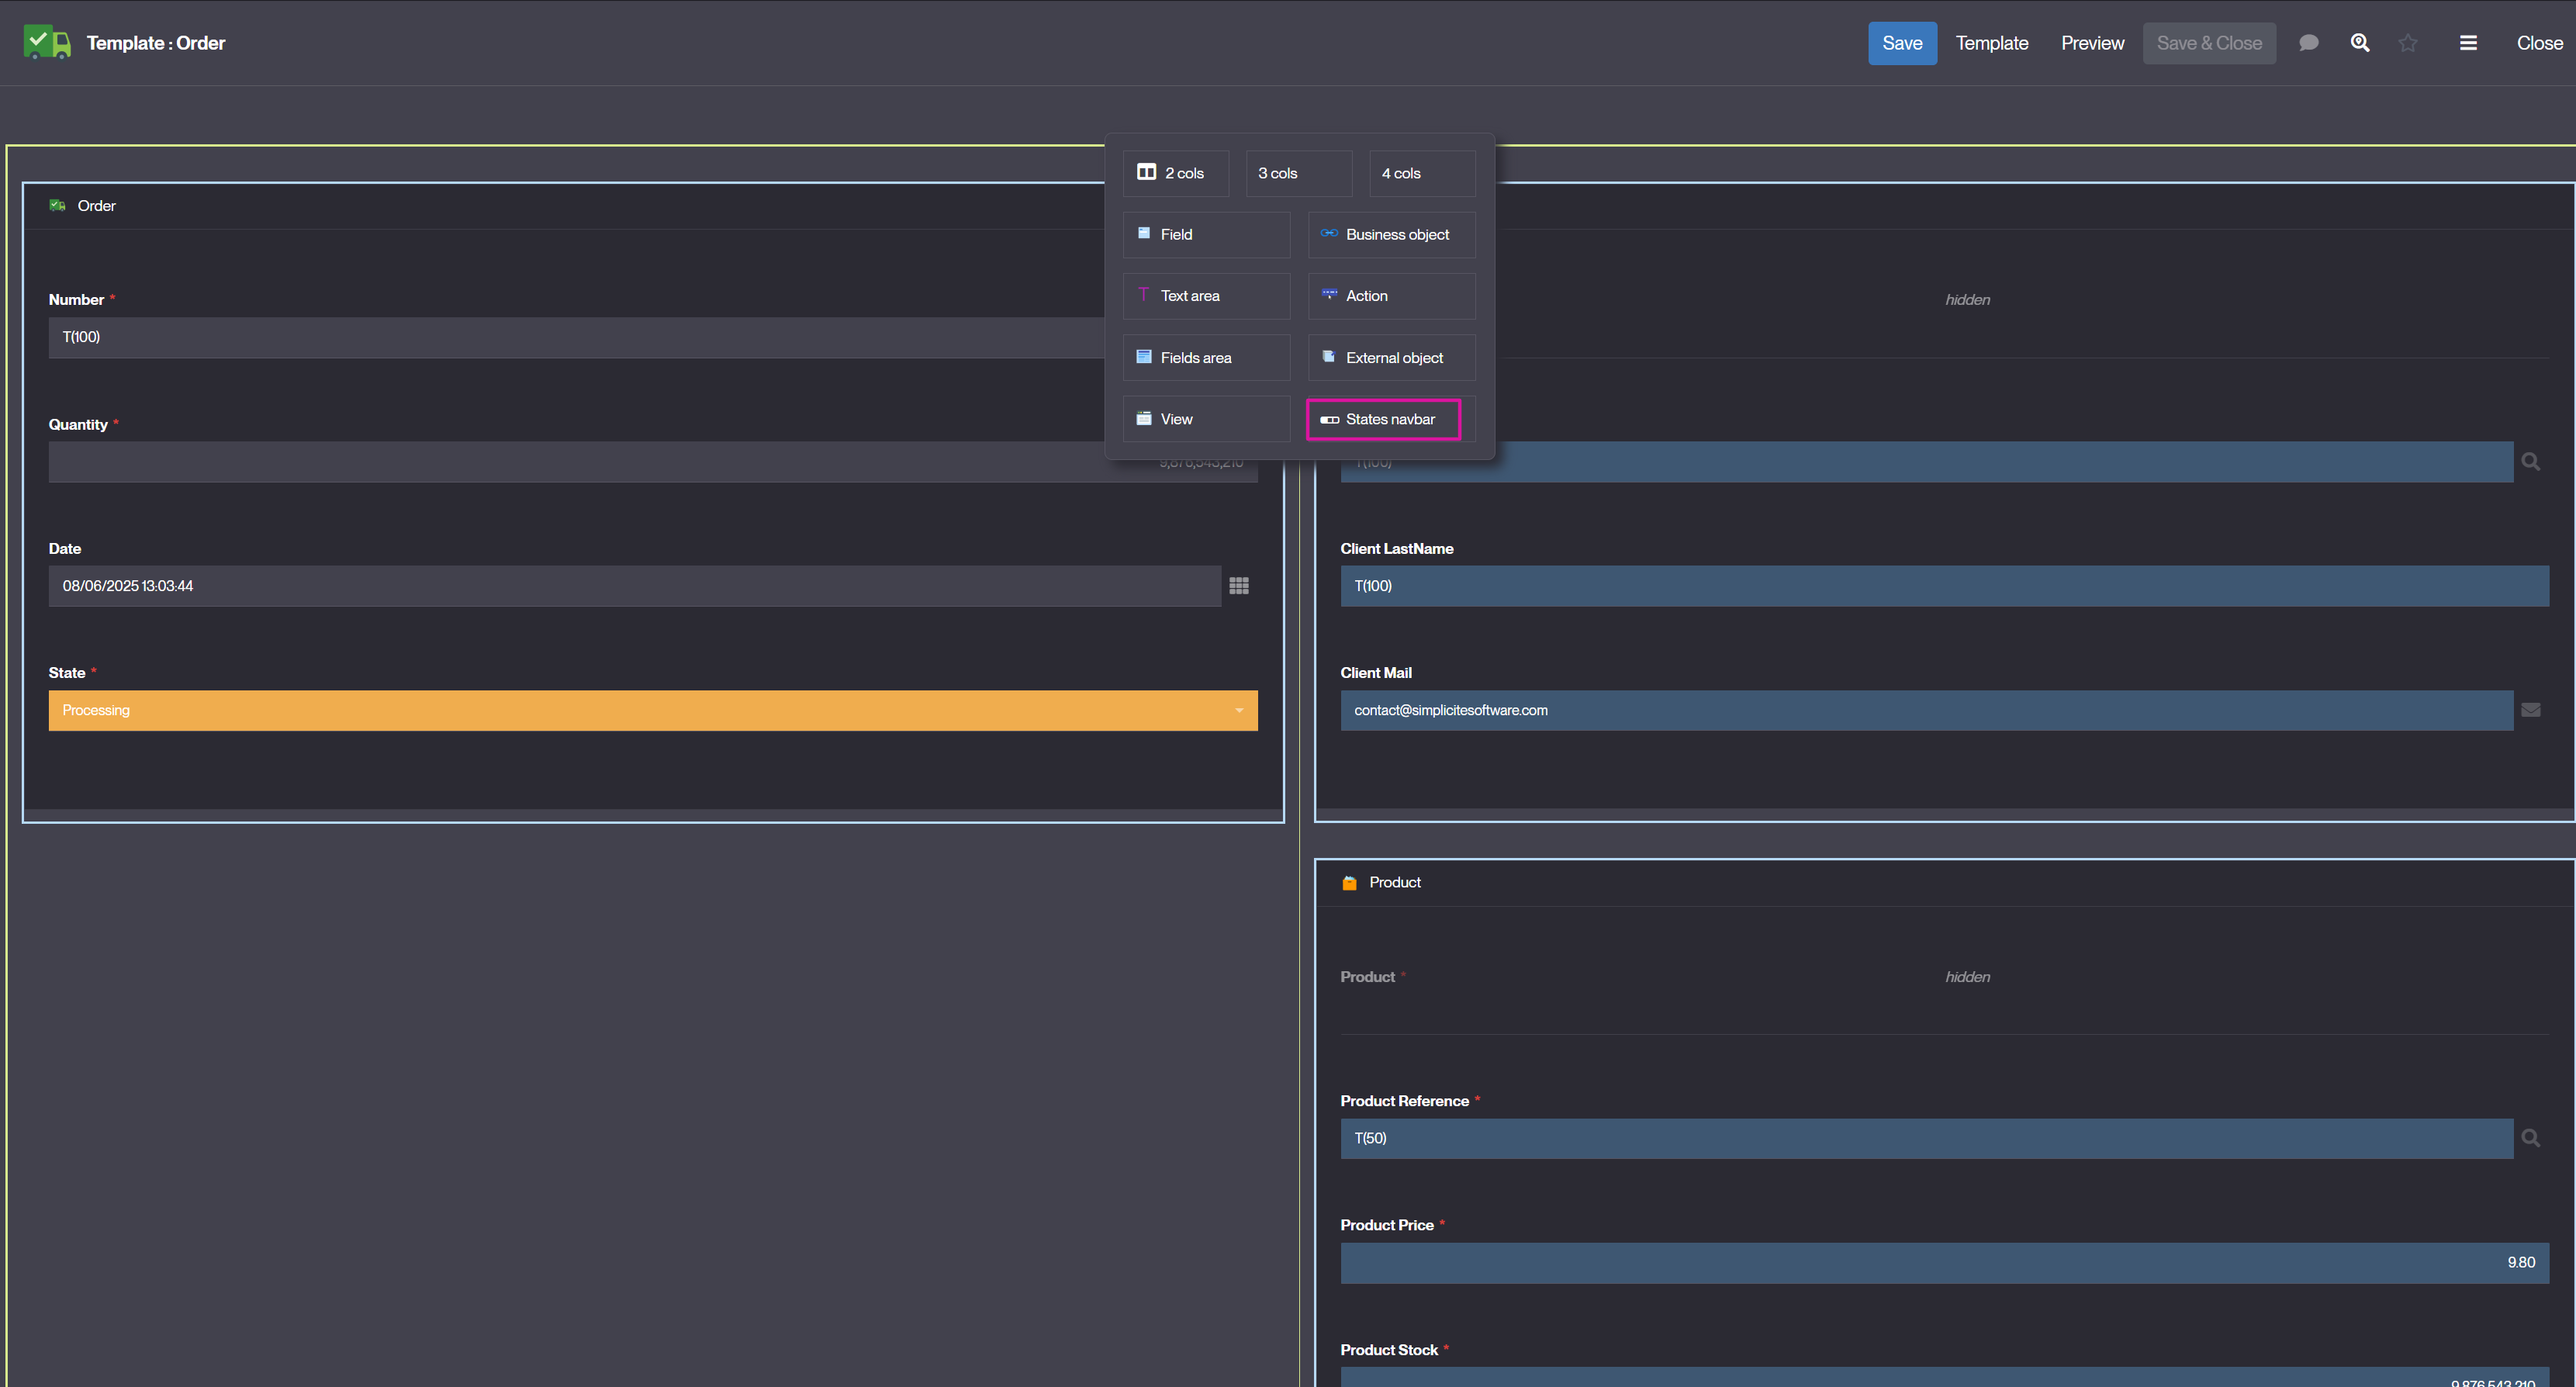
On the "TrnOrder" Business object's form, click + Add > States navbar
-
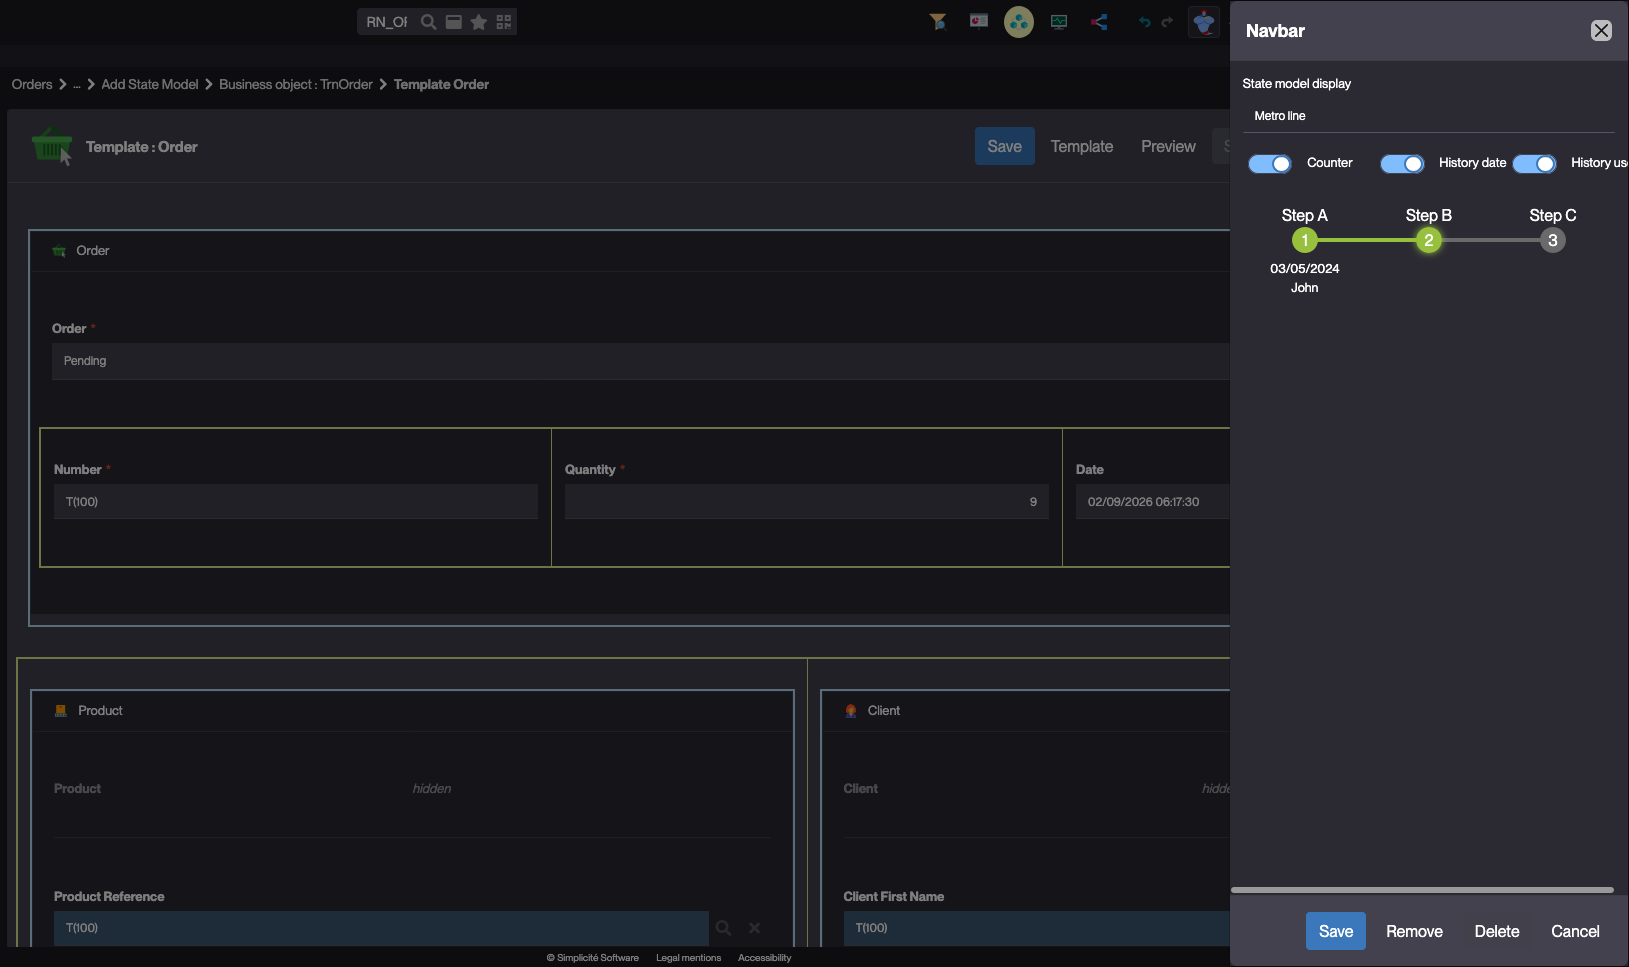
Choose how the state diagram bar will be displayed
- Breadcrumb
- Arrows
- Metro line
-
Select what is displayed on milestones:
- Counter: step counter
- History Date: Last transition date
- History User: User who performed the last transition
note- Visited steps are based on the history table
- Current step, optional and exception roles can have their own style
- Non visited milestones (from list of values) are displayed after the visited ones
Test the State model with the usertest User
To test the State model, follow the steps below :
-
Clear the platform's cache and log in using usertest
For a detailed step-by-step, see : Testing the User
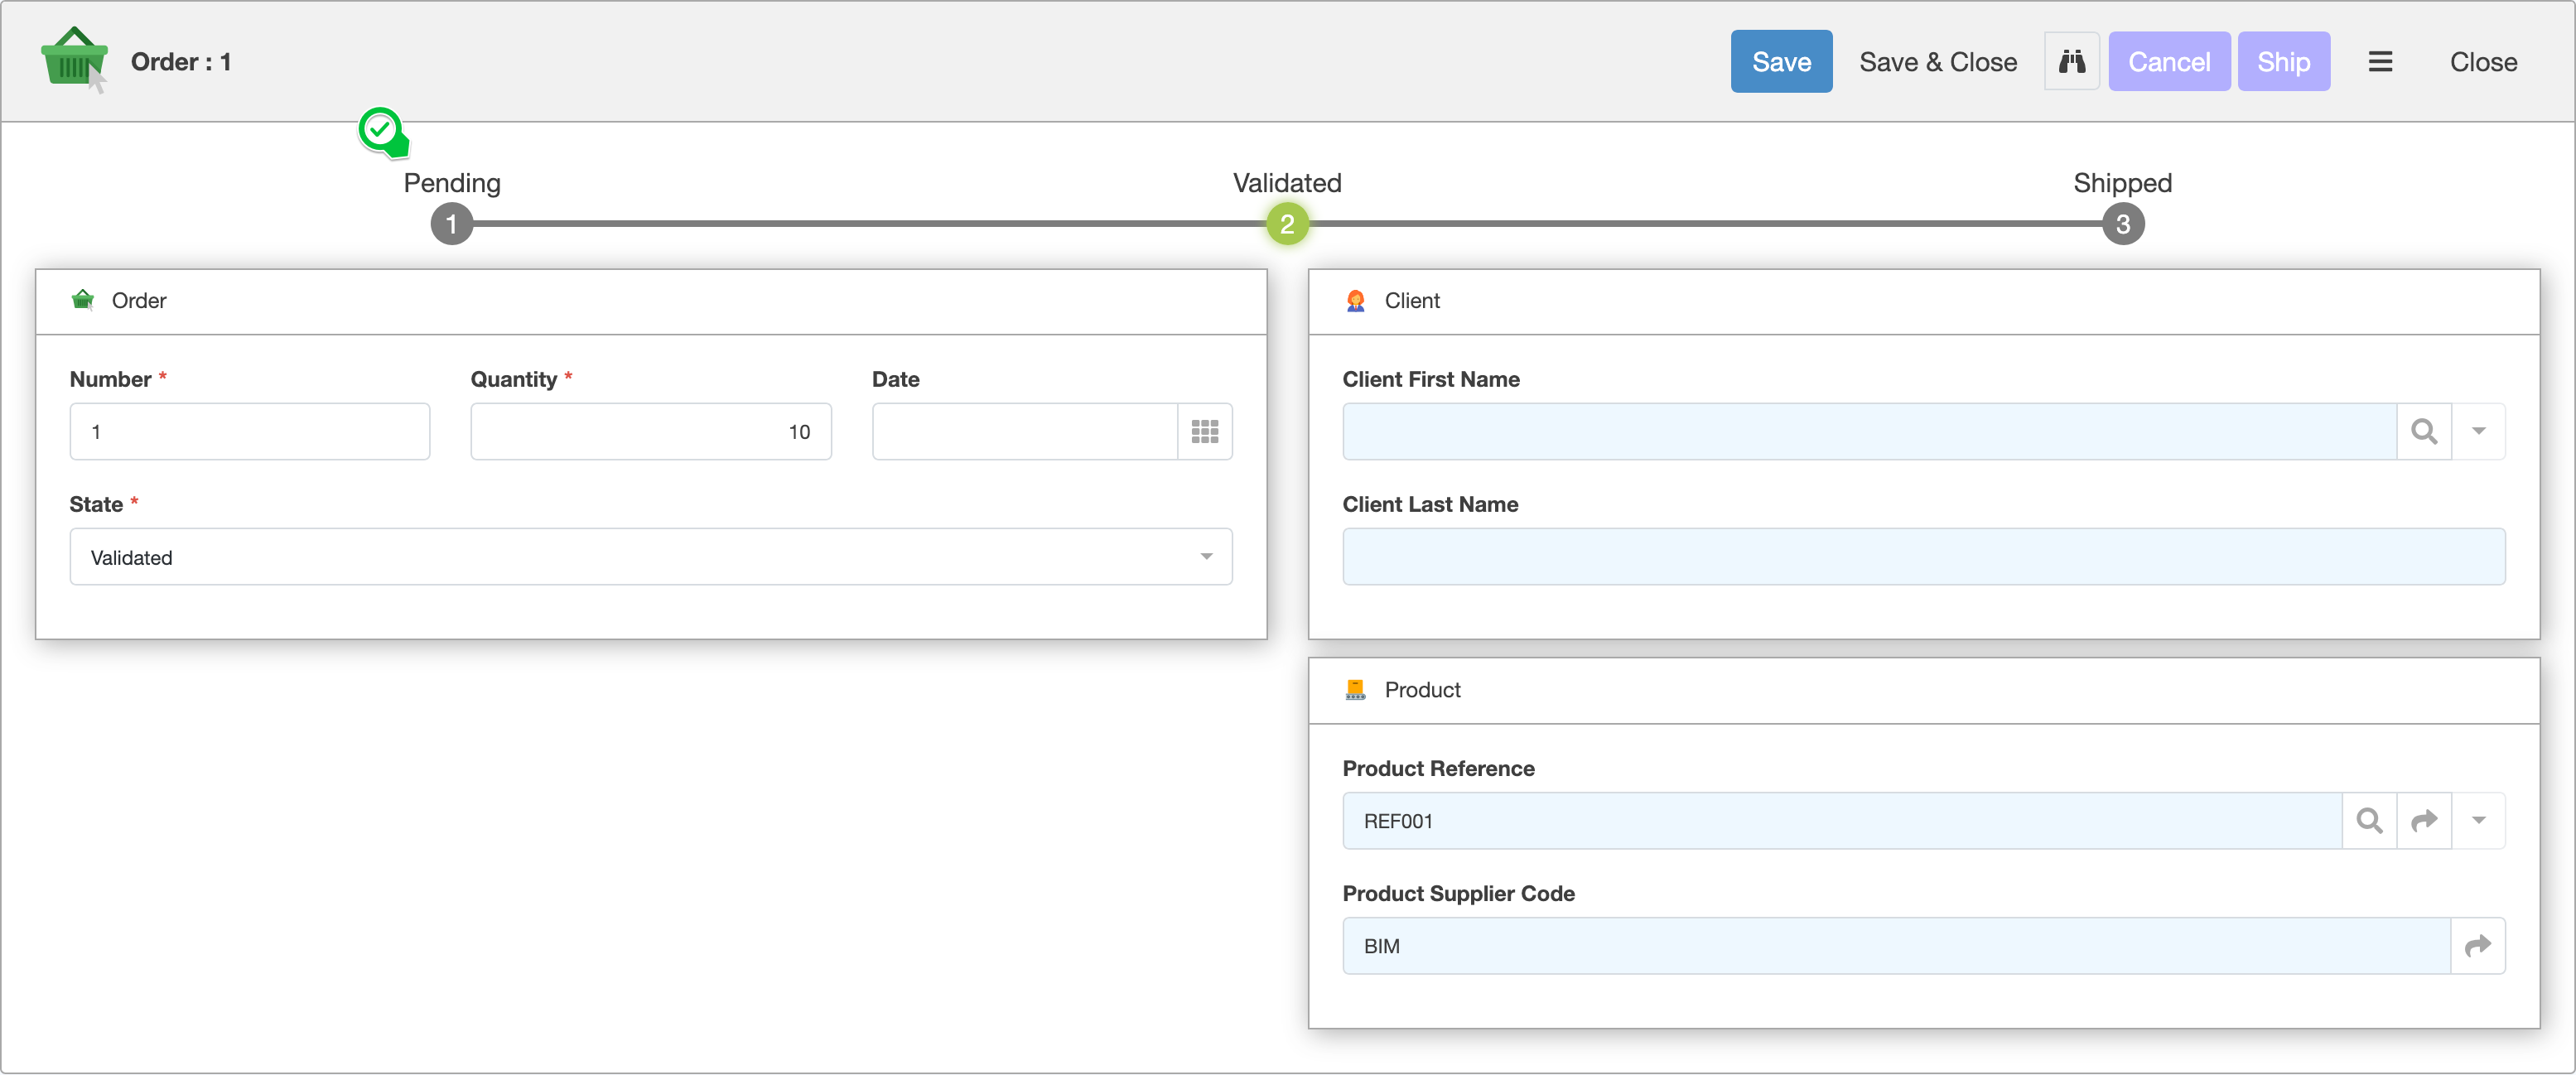
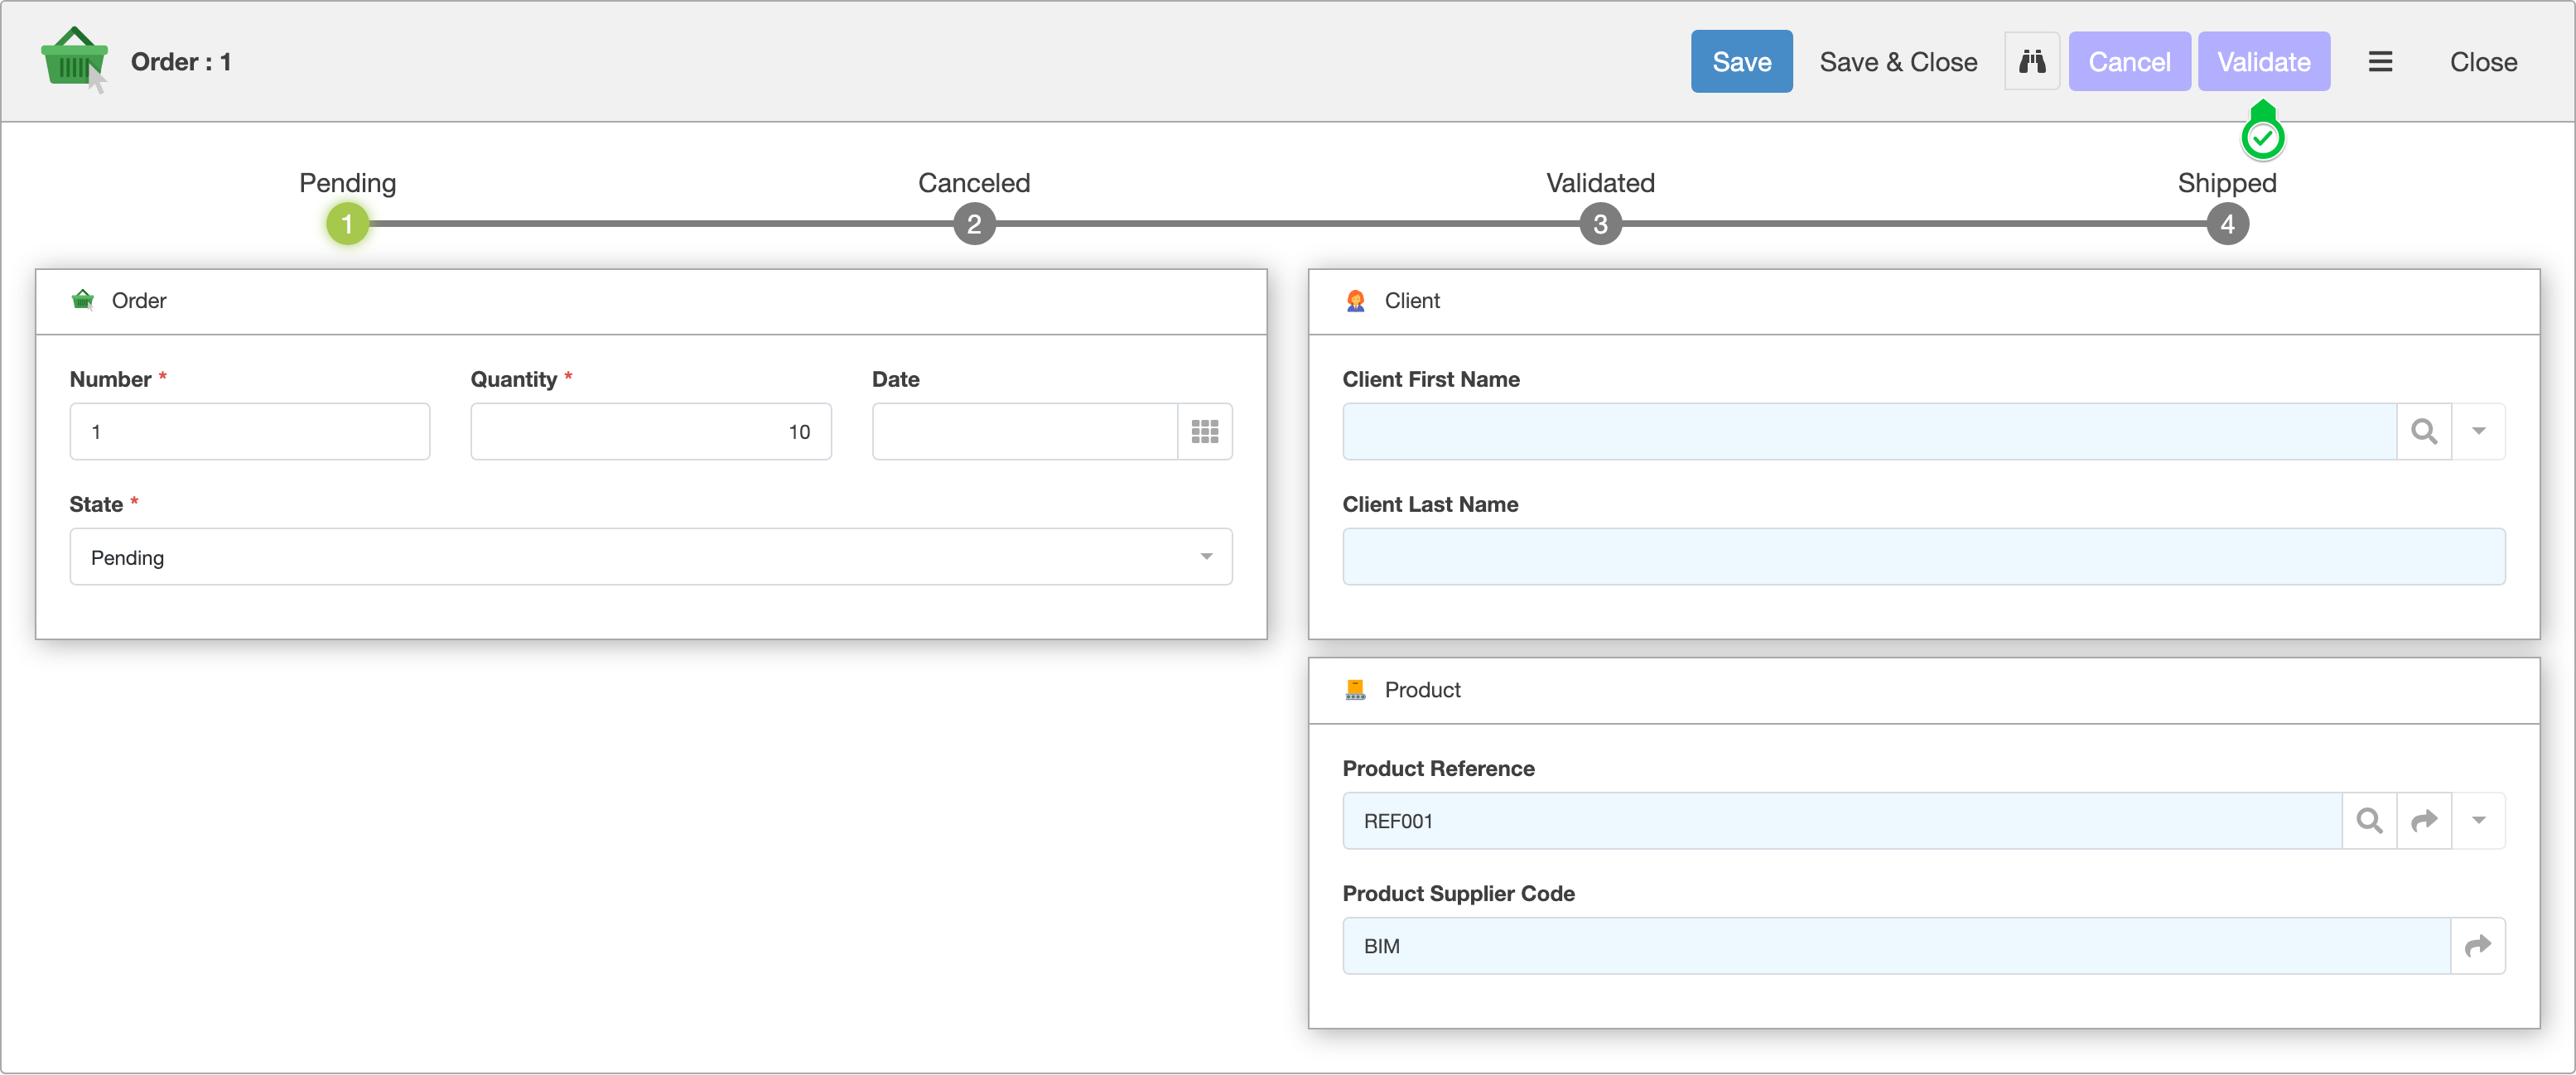
SuccessExpected result:
- In the Order menu
- The list of States are visible
-
Open or create an Order For a detailed step-by-step, see : Adding data
-
Click Validate
-
Click Yes
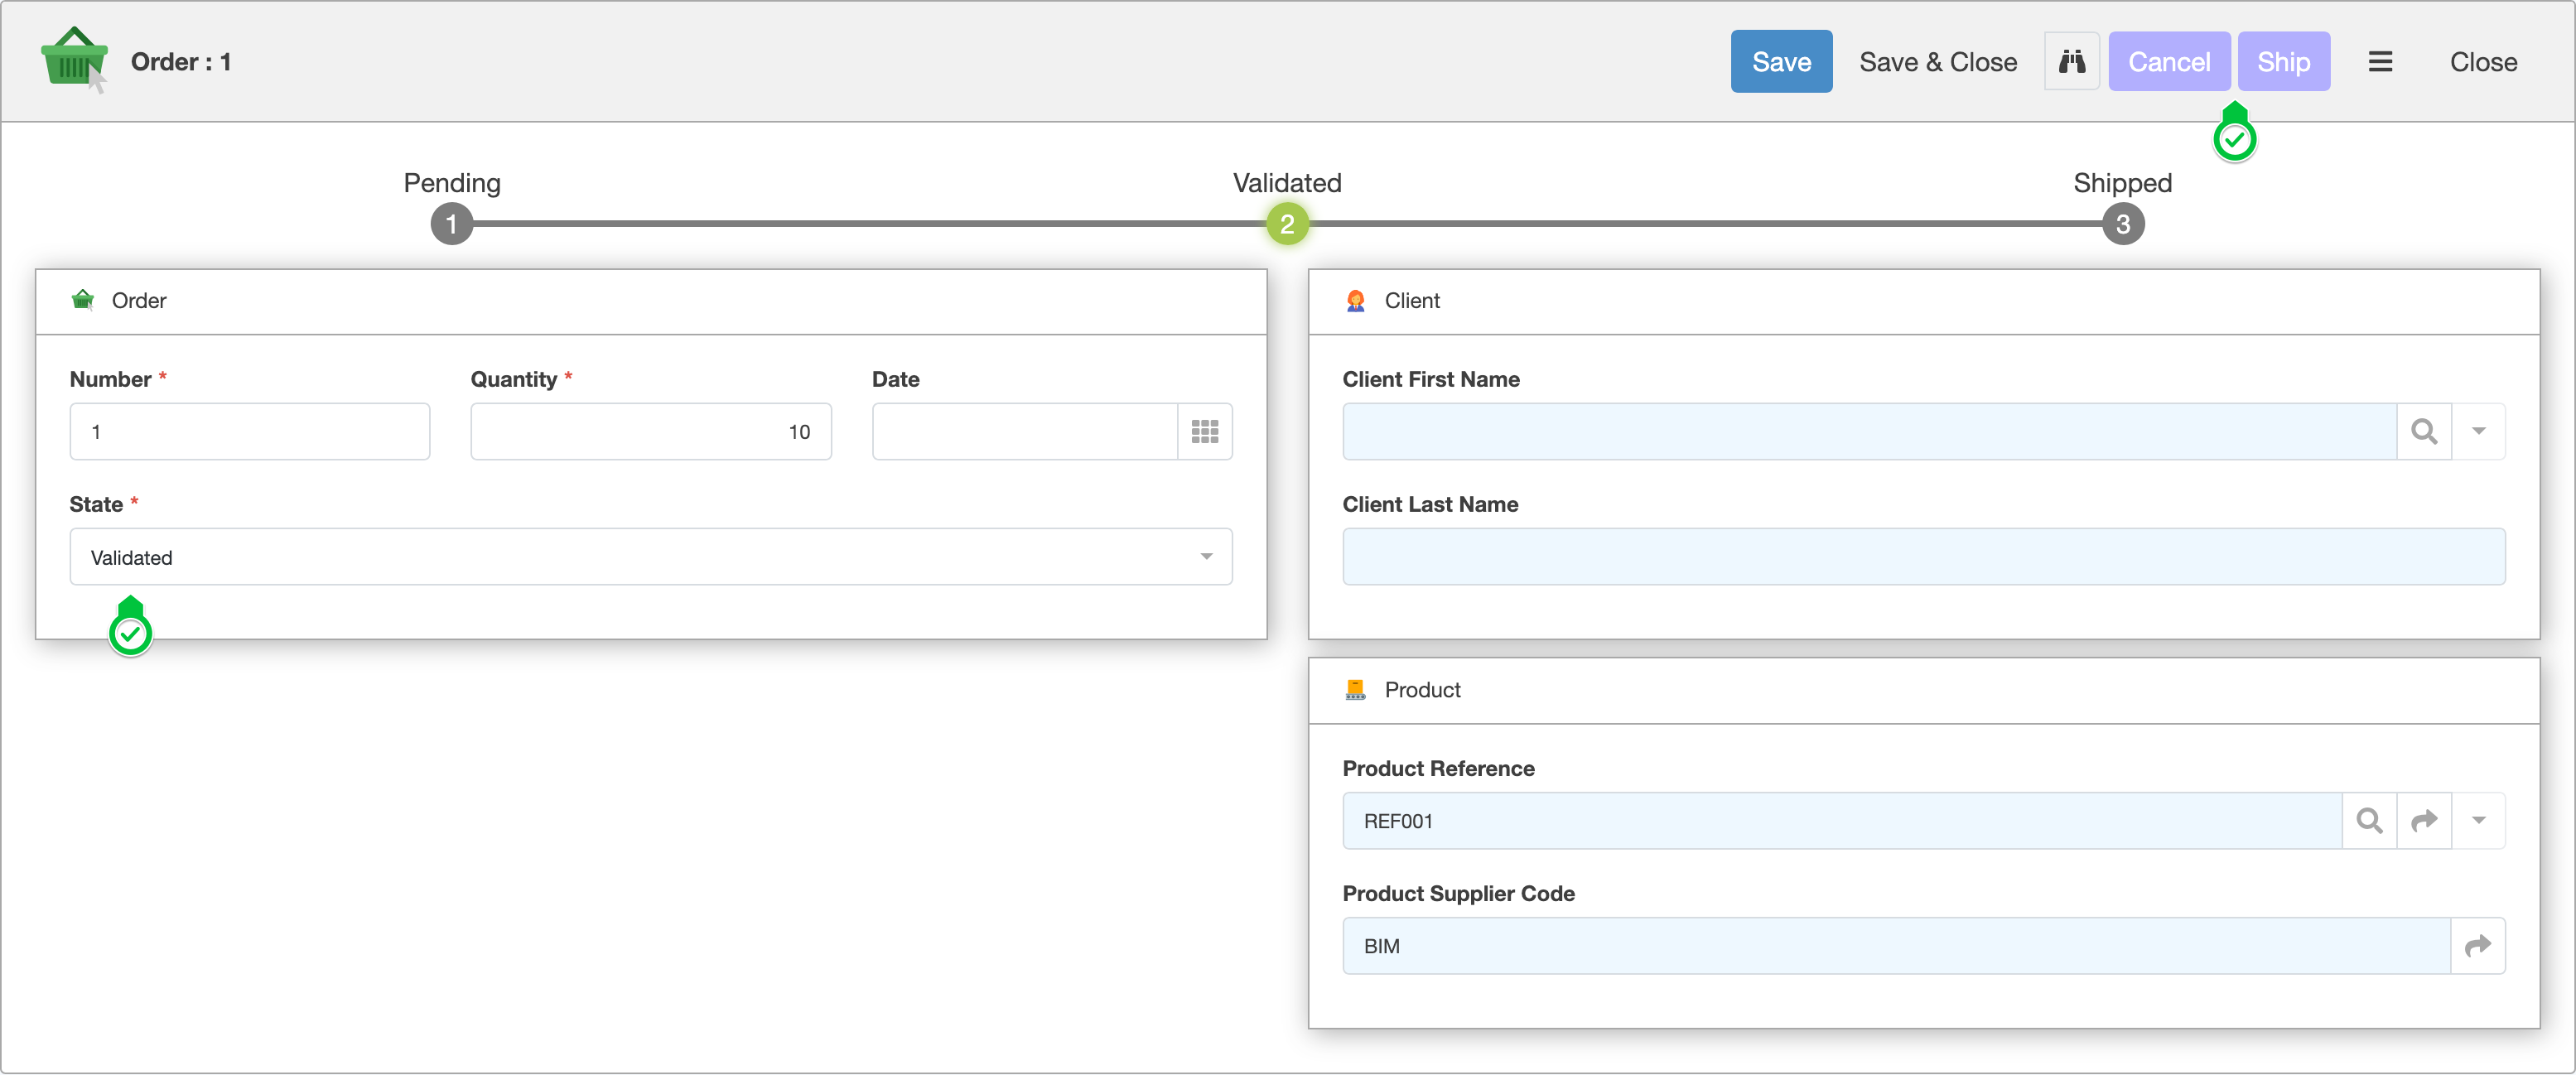
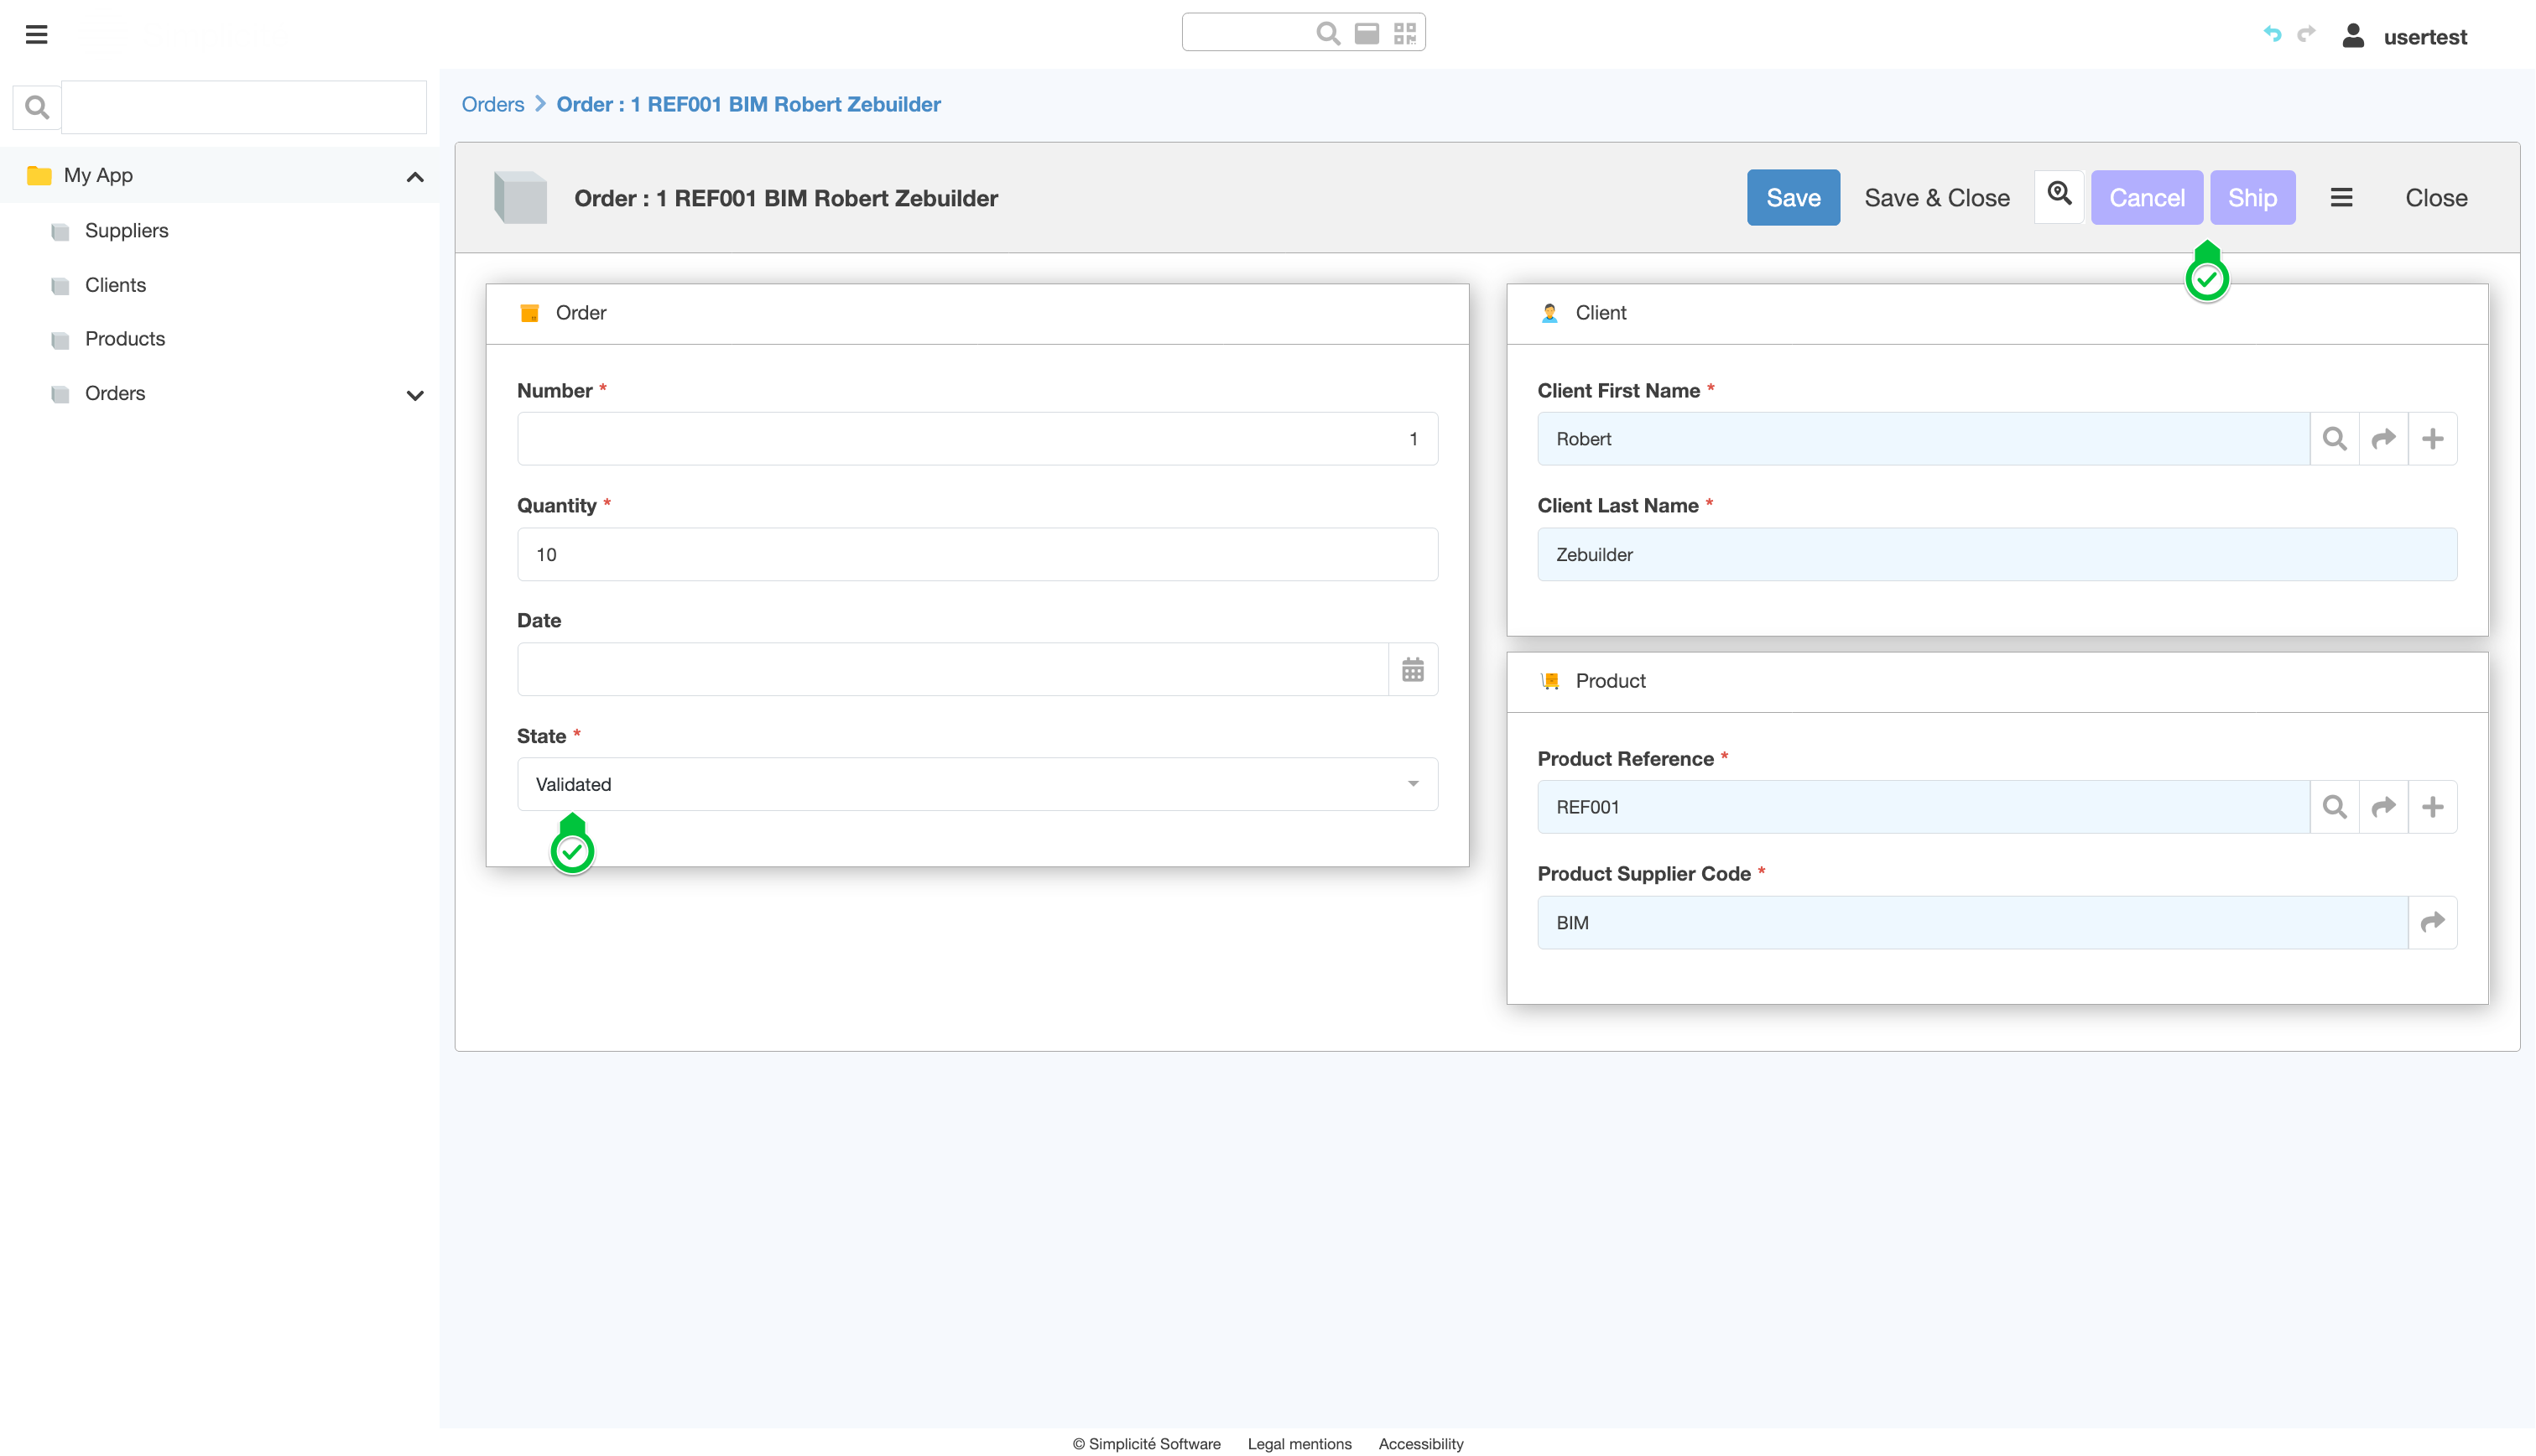
SuccessExpected result:
- The state field is updated with : "Validated"
- The buttons "Cancel" and "Ship" are available
-
With optional states navbar
SuccessExpected result: